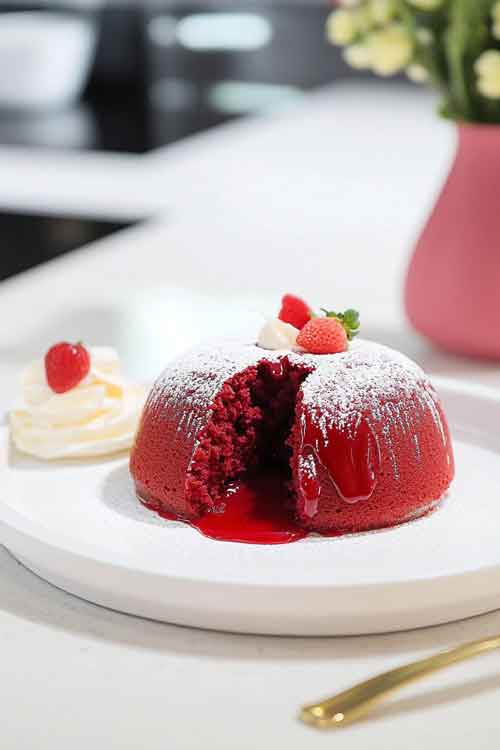
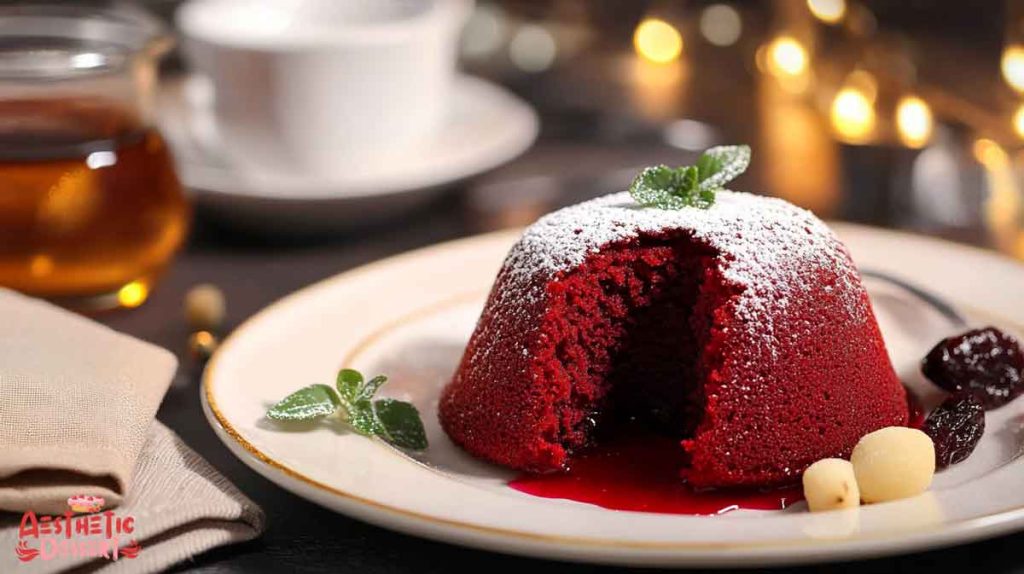
Red velvet molten lava cake is a decadent treat that combines the rich flavors of red velvet with a gooey molten center. This recipe is perfect for impressing guests or indulging in a luxurious dessert at home. Let’s dive into the step-by-step process to create this irresistible delight.
Red Velvet Molten Lava Cake Recipe
Ingredients
To prepare the perfect red velvet molten lava cake, gather these simple ingredients:
- 1/3 cup white chocolate (chopped)
- 3 tbsp unsalted butter (melted)
- 1/4 cup granulated white sugar
- 1 large egg
- 3 tbsp all-purpose flour
- 1 tbsp unsweetened cocoa powder
- 1/2 tbsp red food coloring gel (Americolor Liquid Gel Super Red works well)
- Powdered sugar (for dusting)
Required Kitchen Tools
Ensure a smooth baking experience with these essential tools:
- Mixing Bowl: To prepare and combine the batter.
- Whisk: For mixing ingredients into a smooth consistency.
- Ramekins (4 oz): Individual baking dishes for the molten lava cakes.
- Double Boiler or Heatproof Bowl and Pot: For melting white chocolate gently.
- Baking Sheet: To hold the ramekins while baking.
- Spatula: To loosen the cake from the ramekin edges.
Preparing the Batter
- Melt the White Chocolate: Place the chopped white chocolate in a heatproof bowl. Set the bowl over a pot of simmering water, ensuring it doesn’t touch the water. Stir continuously until the chocolate melts into a smooth consistency.
- Incorporate Butter and Sugar: Once melted, stir in the melted butter until fully combined. Then, mix in the sugar until the mixture becomes glossy and smooth.
- Add Egg and Dry Ingredients: Whisk in the egg, followed by the flour and cocoa powder. Continue whisking until the batter is uniform and lump-free.
- Add Food Coloring: Stir in the red food coloring gel until the batter reaches your desired shade. Adjust the quantity if needed for a vibrant red hue.
Preparing the Ramekins
- Grease and Flour the Ramekins: Thoroughly coat the insides of two 4 oz ramekins with butter, making sure to cover every spot. This ensures the cakes will release easily after baking. Lightly dust the ramekins with flour, then tap out any excess by turning them upside down and gently tapping against a countertop.
- Divide the Batter: Evenly pour the prepared batter into the greased ramekins. Make sure not to overfill; leave a little room at the top to allow the cakes to rise.
- Freeze the Batter: Place the ramekins into the freezer for 30 minutes to 1 hour. Freezing helps create the molten lava center during baking.
Preheating the Oven
While the batter chills, preheat your oven to 400°F (200°C). Having the oven at the right temperature is key to achieving the perfect texture: a set outer layer and a gooey center.
Baking the Cakes
- Bake the Cakes: Once the batter has chilled, place the ramekins directly from the freezer onto a baking sheet. Transfer the sheet to the preheated oven and bake for 14–16 minutes. Watch closely as the end of the baking time approaches. The tops of the cakes should appear set and slightly dry, but they should still jiggle slightly when gently touched—this indicates the molten center.
- Cooling Time: Remove the ramekins from the oven and allow them to cool for about 10 minutes. This step is essential to help the cakes set and make them easier to release from the ramekins.
Releasing the Cakes
- Loosen the Edges: Using a spatula or butter knife, carefully run it around the edges of each ramekin to loosen the cake. Be gentle to avoid breaking the delicate structure of the cake.
- Invert the Cakes: Place a dessert plate over the top of each ramekin. Using heat-resistant gloves, firmly hold the ramekin and plate together. Quickly invert them so the plate is on the bottom and the ramekin is upside down. Gently tap the ramekin to release the cake onto the plate.
Serving the Red Velvet Molten Lava Cakes

- Dust with Powdered Sugar: For an elegant finish, lightly dust the cakes with powdered sugar. This adds a touch of sweetness and enhances the red velvet’s vibrant color.
- Serve Immediately: These cakes are best enjoyed warm, straight out of the ramekin. When sliced open, the molten center should ooze out beautifully, creating a rich and indulgent treat.
- Optional Additions: For an extra layer of indulgence, pair the cakes with a scoop of vanilla ice cream, a dollop of whipped cream, or fresh berries. These accompaniments complement the rich chocolate and velvety texture of the cake.
Storage Tips
- Refrigerating Leftovers: If you have any leftovers (though unlikely!), store them in an airtight container in the refrigerator for up to two days. Reheat in the microwave for 15–20 seconds before serving.
- Freezing Unbaked Cakes: For future cravings, you can freeze the batter-filled ramekins. Cover them tightly with plastic wrap and store in the freezer for up to a month. Bake directly from frozen, adding 1–2 minutes to the baking time.
Conclusion
Making red velvet molten lava cakes at home is easier than you think, and the results are absolutely divine. With a perfectly gooey center, rich chocolate flavor, and that signature red velvet hue, these cakes are a showstopper for any occasion. Whether it’s a romantic dinner or a festive gathering, this dessert is sure to impress.
So, grab your ingredients, follow these steps, and enjoy a decadent treat that’s worth every bite!


