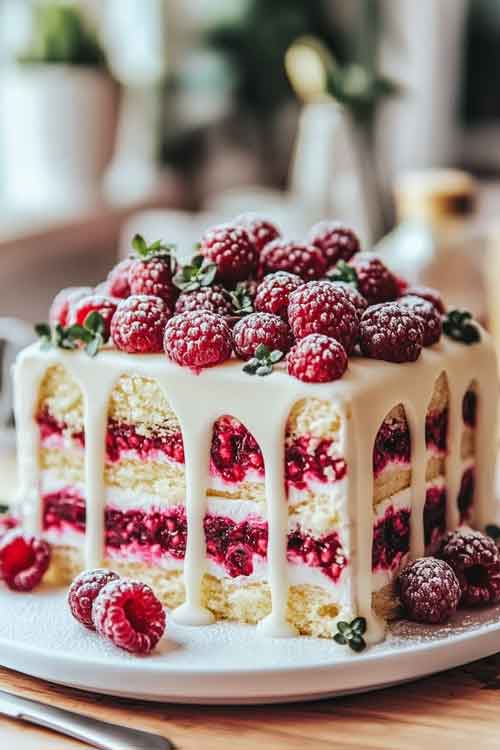
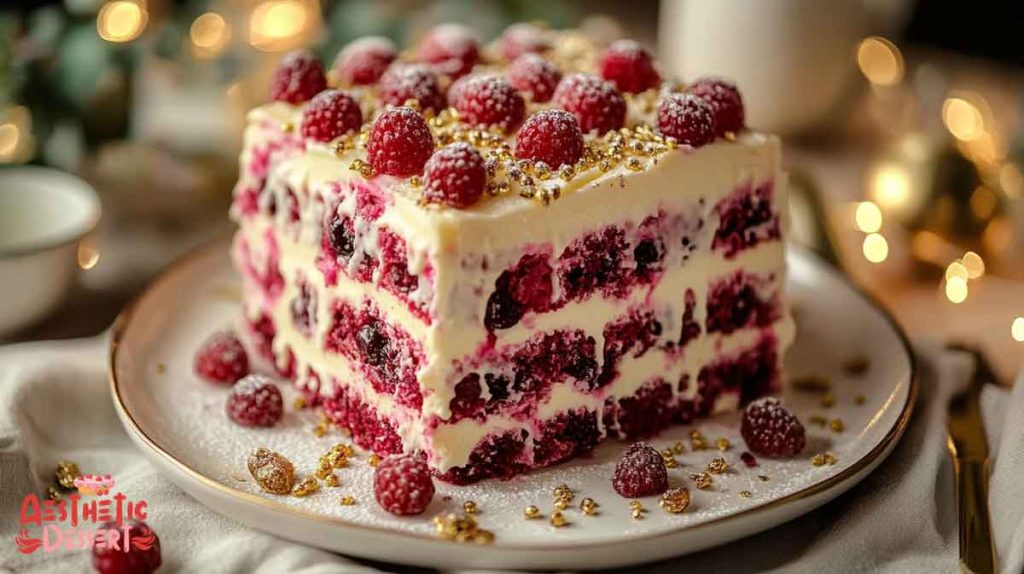
If you’re searching for a dessert that’s as stunning as it is delicious, look no further than the White Chocolate Raspberry Dream Cake. This elegant creation combines the rich, creamy flavor of white chocolate with the vibrant tartness of raspberries, making it a showstopper for any occasion.
Why You’ll Fall in Love with This Cake
This cake is a perfect blend of textures and flavors. Soft, moist layers of cake are filled with a tangy raspberry filling and covered in a silky white chocolate ganache frosting. Each bite offers a harmonious balance of sweetness and zing, leaving you craving more.
What makes this cake truly special is its versatility. It’s fancy enough for celebrations yet simple enough to make for a cozy evening treat. Plus, I’ll guide you step-by-step, ensuring you achieve bakery-level results without the stress.
Part 2: Ingredients for White Chocolate Raspberry Dream Cake
To create this indulgent dessert, you’ll need carefully selected ingredients for the cake, raspberry filling, and the decadent white chocolate ganache frosting. Let’s break it down:
For the Raspberry Filling
- Fresh or frozen raspberries: 1 ¼ to 1 ½ cups (170 g)
- Granulated sugar: 2 tablespoons (25 g)
- Lemon juice: ½ teaspoon
- Water: 2 teaspoons (10 ml)
- Cornstarch: 1 ½ teaspoons (4 g)
For the Cake Batter
- All-purpose flour: 1 ¾ cups (250 g)
- Baking powder: 1 ¼ teaspoons
- Baking soda: ¼ teaspoon
- Salt: ½ teaspoon
- Unsalted butter: 6 tablespoons (84 g), softened
- Sunflower oil: 2 tablespoons (30 ml)
- Granulated sugar: 1 ⅓ cups (265 g)
- Pure vanilla extract: 1 ½ teaspoons (7 ml)
- Large egg: 1, at room temperature
- Large egg whites: 2, at room temperature
- Sour cream: ½ cup (120 ml)
- Whole milk: ½ cup (120 ml)
- Fresh raspberries: 1 ¼ cups (150 g), gently folded into the batter
For the White Chocolate Ganache Frosting
- White chocolate: 8 oz (225 g), finely chopped
- Heavy cream: 1 cup (240 ml), divided
- Vanilla bean seeds or vanilla extract: 1 teaspoon
These ingredients are the foundation of the White Chocolate Raspberry Dream Cake. Each component contributes to its flavor, texture, and visual appeal, ensuring a cake that’s as delightful to eat as it is to make.
Part 3: Step-by-Step Guide to Preparing Your White Chocolate Raspberry Dream Cake
Let’s dive into the process of bringing this elegant cake to life, starting with the raspberry filling, followed by the cake batter, and finally the white chocolate ganache frosting.
Step 1: Prepare the Raspberry Filling
- Combine the raspberries, granulated sugar, and lemon juice in a small saucepan over medium heat. Cover and let it cook for about 3 minutes until the raspberries soften and release their juices.
- Stir the mixture, breaking down the raspberries gently, and let it come to a simmer.
- In a small bowl, mix water and cornstarch until smooth. Add this mixture to the simmering raspberries, stirring constantly.
- Cook until the mixture thickens and begins to bubble. Remove from heat and strain through a fine mesh sieve to remove seeds, if desired. Alternatively, keep the seeds for added texture.
- Allow the filling to cool completely and chill it in the refrigerator for at least 30 minutes.
Step 2: Make the Cake Batter
- Preheat your oven to 350°F (175°C). Line the bases of two 8-inch round cake pans with parchment paper. You can grease the sides lightly or leave them ungreased for more height.
- Sift together the flour, baking powder, baking soda, and salt in a medium bowl.
- In a large bowl, beat the softened butter, oil, sugar, and vanilla extract using an electric mixer on medium speed until the mixture is light and fluffy (about 2 minutes).
- Add the whole egg and beat until incorporated. Then, add the egg whites and beat until the mixture is smooth and well-blended.
- Mix in the sour cream, followed by half the dry ingredients. Gradually add half the milk, mixing on low speed. Repeat with the remaining dry ingredients and milk. Finish with a quick mix on high speed for 5 seconds to emulsify the batter.
- Gently fold in the fresh raspberries to ensure even distribution without crushing them.
Step 3: Bake the Cake Layers
- Divide the batter evenly between the prepared pans, smoothing the tops with a spatula.
- Bake in the preheated oven for 25–30 minutes, or until the cakes are lightly golden and a toothpick inserted into the center comes out clean.
- Allow the cakes to cool in the pans for 20–30 minutes. Then, run a knife around the edges, invert them onto a wire rack, and remove the parchment paper. Let the cakes cool completely before assembling.
Step 4: Make the White Chocolate Ganache Frosting
- Place the chopped white chocolate in a heatproof bowl. Heat ½ cup of heavy cream with the scraped vanilla bean seeds (or vanilla extract) in a saucepan over medium heat until it begins to simmer.
- Pour the hot cream over the white chocolate, cover, and let it sit for 2 minutes. Whisk until the mixture is smooth and silky.
- Allow the ganache to cool for 5 minutes, then stir in the remaining cold heavy cream. Chill the ganache in the refrigerator for at least 2 hours or overnight.
- Once chilled, beat the ganache with an electric mixer on medium speed until it becomes thick and fluffy.
Part 4: Assembling and Decorating Your White Chocolate Raspberry Dream Cake
Now that your cake layers, raspberry filling, and white chocolate ganache frosting are ready, it’s time to bring everything together to create your stunning dessert masterpiece.
Step 1: Level the Cake Layers (Optional)
- Use a serrated knife to level the tops of your cake layers if they’ve domed slightly during baking. This ensures a stable and even assembly.
Step 2: Assemble the Cake
- Place the first cake layer on your serving plate or cake stand. If desired, secure it with a small dollop of frosting underneath to prevent sliding.
- Fill a piping bag with about 1 cup of the frosting and pipe a border around the edge of the cake. This creates a barrier to keep the raspberry filling from seeping out.
- Spread approximately 1 cup of the raspberry filling evenly within the frosting border, ensuring it stays inside the circle.
- Carefully place the second cake layer on top, aligning it with the bottom layer for a neat appearance.
Step 3: Frost the Cake
- Use a spatula to spread a thin crumb coat of frosting over the entire cake. This locks in any loose crumbs and creates a smooth base.
- Chill the cake for 15–20 minutes to set the crumb coat.
- Apply a generous layer of frosting over the top and sides of the cake, smoothing it with a large offset spatula for a clean finish. Alternatively, create rustic swirls for a more relaxed look.
Step 4: Decorate and Add Finishing Touches
- Dollop small spoonfuls of the remaining raspberry filling on top of the cake. Use a toothpick or skewer to gently swirl it into the frosting for a marbled effect.
- Garnish with fresh raspberries, white chocolate shavings, or both for an elegant presentation.

Step 5: Chill and Serve
- Place the assembled cake in the refrigerator for at least 30 minutes before serving to allow the layers to set and the flavors to meld. Serve at room temperature for the best taste and texture.
Storage Tips
- Room Temperature: Store the cake in an airtight container for up to 2 days in a cool area.
- Refrigerator: Cover and refrigerate for up to a week.
- Freezer: Wrap individual slices in plastic wrap, then store in an airtight container for up to 3 months.
Conclusion
The White Chocolate Raspberry Dream Cake is more than just a dessert—it’s a celebration of flavors and textures. From the rich ganache frosting to the vibrant raspberry filling, every bite delivers a delightful combination that’s sure to impress. Whether it’s for a special occasion or simply treating yourself, this cake is a guaranteed crowd-pleaser.
Enjoy creating and savoring this dreamy masterpiece!


