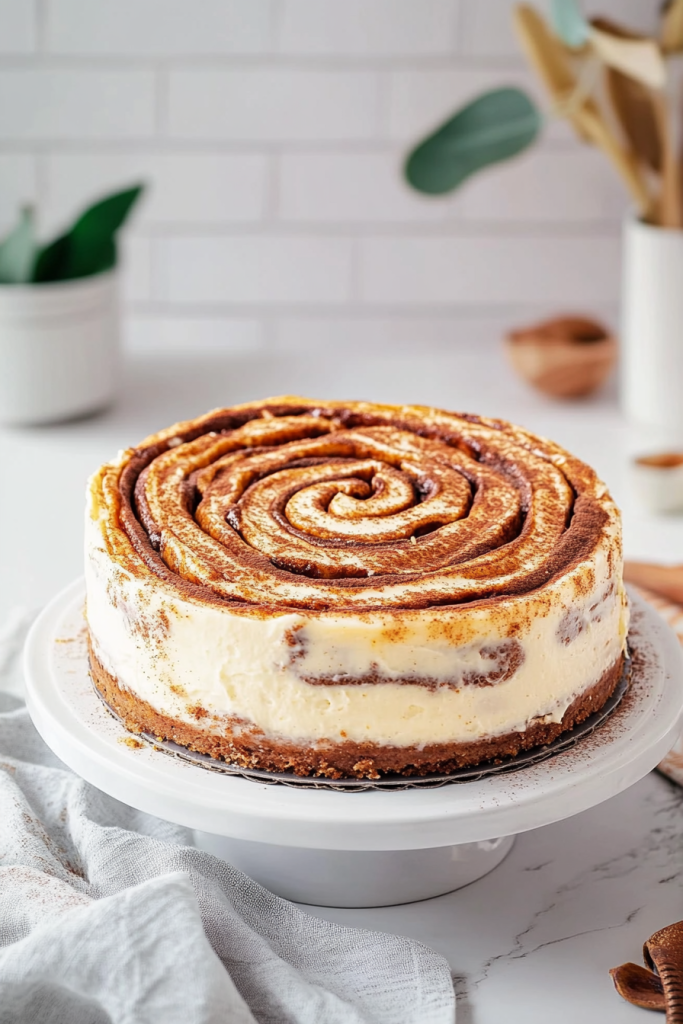
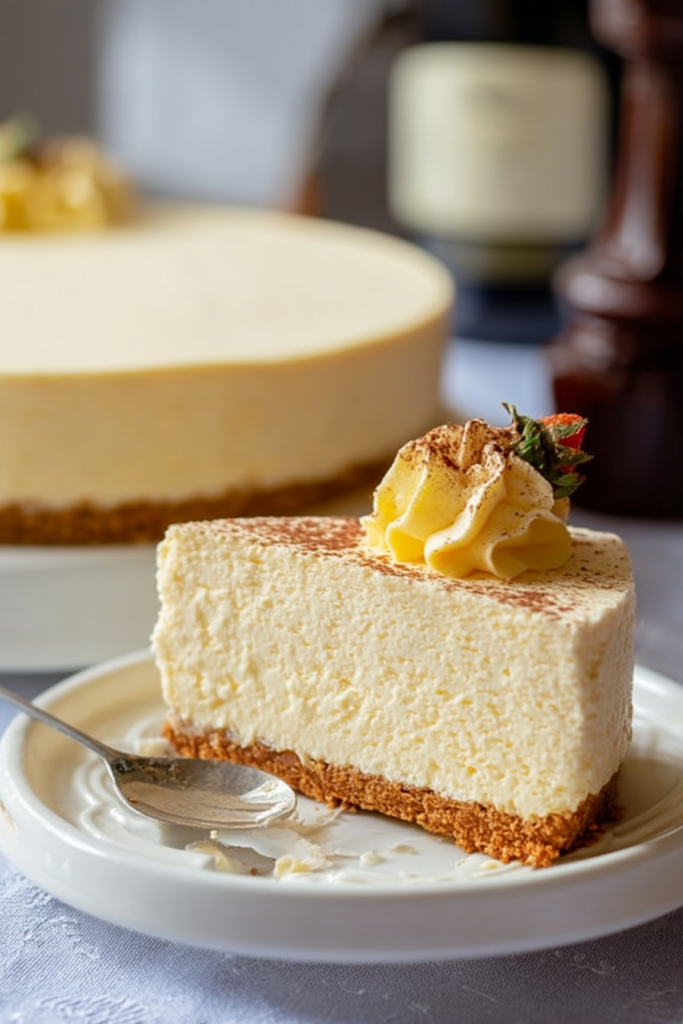
The ultimate indulgence for any dessert lover – Cream Cheese Cheesecake! This velvety smooth, rich, and creamy dessert features a buttery graham cracker crust topped with a luscious cream cheese filling that’s perfectly balanced between sweet and tangy. Every bite melts in your mouth with that signature cheesecake texture that’s somehow both light and decadent at the same time. Whether you’re celebrating a special occasion or simply craving something extraordinary, this classic cream cheese cheesecake is guaranteed to impress. The best part? Despite its reputation as a complicated dessert, my foolproof method makes this cheesecake surprisingly simple to master!
About The Recipe
I’ve always believed that a good cheesecake is the ultimate test of a baker’s skill – but that doesn’t mean it has to be complicated! After years of testing and tweaking, I’ve developed what I consider to be the perfect cream cheese cheesecake recipe.
When I first started my cheesecake journey, I encountered every problem imaginable – cracks, sunken centers, overbaked edges. But through countless trials (and delicious errors!), I’ve discovered the secrets to creating a flawless cheesecake every single time.
What makes this recipe special is the balance of textures and flavors. The graham cracker crust provides the perfect crisp foundation for the silky-smooth filling. And by using room temperature ingredients and employing a water bath technique, you’ll achieve that perfect velvety consistency without any cracks or uneven baking.
Every bite delivers that rich cream cheese flavor with just the right amount of sweetness, making it the perfect canvas for any topping you might want to add – though it’s absolutely divine all on its own!
Reasons You Will Love This Cream Cheese Cheesecake
- Foolproof recipe with step-by-step instructions for guaranteed success
- Perfect balance of sweet and tangy flavors
- Ultra-creamy texture with no cracks
- Classic graham cracker crust that doesn’t get soggy
- Versatile base for endless topping possibilities
- Impressive dessert that can be made ahead of time
- Perfect for special occasions or whenever you’re craving something indulgent
Equipment Needed
- 9-inch Springform Pan
- Parchment Paper
- Stand Mixer or Hand Mixer
- Large Mixing Bowl
- 9×13-inch Baking Pan (for water bath)
- Measuring Cups and Spoons
- Spatula
- Cooling Rack
- Aluminum Foil
- Food Processor (optional, for making graham cracker crumbs)
Ingredients
For The Crust:
- 1½ cups graham cracker crumbs (about 12 full sheets)
- 5 tablespoons granulated sugar
- ½ cup salted butter, melted
- Pinch of salt
Description:
- Graham Cracker Crumbs – The foundation of our crust that provides that classic cheesecake flavor and slight crunch. You can buy pre-made crumbs or crush your own in a food processor.
- Granulated Sugar – Adds just enough sweetness to the crust to complement the filling.
- Salted Butter – Binds the crust together and adds richness. Make sure it’s fully melted for proper incorporation.
- Salt – Just a pinch enhances all the flavors and balances the sweetness.
For The Filling:
- 3 packages (8 ounces each) cream cheese, room temperature
- 8 ounces sour cream, room temperature
- 1¼ cups granulated sugar
- 4 large eggs, room temperature
- 1 tablespoon vanilla extract
Description:
- Cream Cheese – The star of the show! I recommend using Philadelphia Original for the best texture and flavor. Bringing it to room temperature is crucial for a smooth, lump-free filling.
- Sour Cream – Adds a subtle tang and creates that perfect creamy consistency. Room temperature is essential for proper incorporation.
- Granulated Sugar – Sweetens the filling without overwhelming the cream cheese flavor.
- Eggs – Provides structure and richness to the cheesecake. Room temperature eggs blend more easily into the batter.
- Vanilla Extract – Enhances the flavor and adds warmth. Use high-quality pure vanilla extract for the best results.
How To Make A Perfect Cream Cheese Cheesecake
Instructions For The Crust
Step 1: Prepare your pan Preheat your oven to 325°F. Line the bottom of a 9-inch springform pan with parchment paper and generously grease the sides. Wrap the outside of the pan with two layers of heavy-duty aluminum foil to prevent water from seeping in during baking.
Step 2: Make the graham cracker crust In a medium bowl, combine the graham cracker crumbs, granulated sugar, melted butter, and salt. Mix until the mixture resembles wet sand and holds together when pressed. Press this mixture firmly into the bottom of your prepared springform pan, creating an even layer. Use the bottom of a measuring cup to compact the crust tightly.
Step 3: Pre-bake the crust Bake the crust for 10 minutes until it’s lightly golden. Remove from the oven and let it cool while you prepare the filling. Keep the oven on at 325°F.
Instructions For The Filling
Step 1: Prepare the water bath Fill a 9×13-inch baking pan about halfway with hot water and place it on the bottom rack of your oven. This creates a humid environment that helps the cheesecake bake evenly and prevents cracks.
Step 2: Beat cream cheese, sour cream, and sugar In the bowl of your stand mixer fitted with the paddle attachment (or using a hand mixer), beat the room temperature cream cheese, sour cream, and granulated sugar on medium speed for 2-3 minutes until completely smooth and creamy. Stop occasionally to scrape down the sides and bottom of the bowl to ensure everything is well incorporated. The mixture should be silky smooth with no lumps.
Step 3: Add eggs and vanilla Reduce the mixer speed to low and add the vanilla extract. Then add the eggs one at a time, mixing just until each is incorporated before adding the next. Be careful not to overmix once the eggs are added – this can incorporate too much air into the batter and lead to cracks.
Step 4: Pour and prepare for baking Pour the cheesecake filling over the cooled crust. Tap the pan gently on the counter a few times to release any air bubbles that might be trapped in the batter.
Step 5: Bake the cheesecake Carefully place the foil-wrapped springform pan on the middle rack of your oven, above the water bath. Bake for 55-60 minutes. The cheesecake is done when the edges are set but the center still has a slight wobble when you gently shake the pan – it should jiggle like Jell-O, not ripple like a wave.
Step 6: Cool gradually When the cheesecake is done, turn off the oven and slightly crack open the door. Let the cheesecake cool slowly in the oven for about an hour. This gradual cooling helps prevent cracks from forming.
Step 7: Cool completely and chill After an hour, remove the cheesecake from the oven. Run a thin knife around the edge of the pan to loosen the cheesecake from the sides. Let it cool completely on a wire rack, then cover with foil and refrigerate for at least 6 hours, preferably overnight.
Serving and Storage Tips
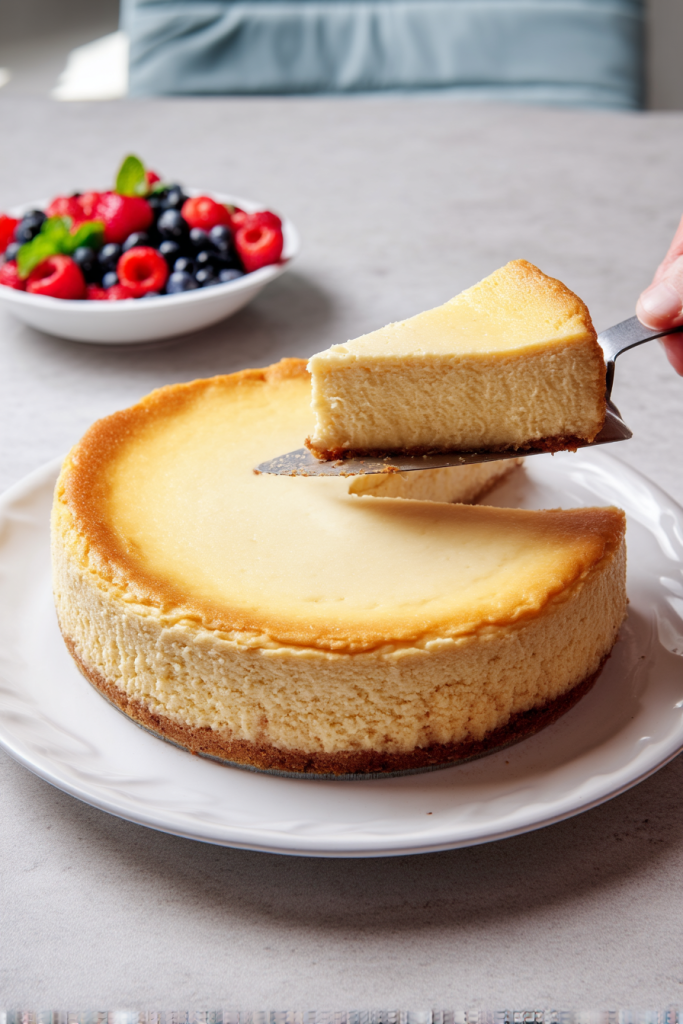
When you’re ready to serve, carefully remove the sides of the springform pan and transfer the cheesecake to a serving plate. For the cleanest slices, dip a sharp knife in hot water and wipe it clean between cuts.
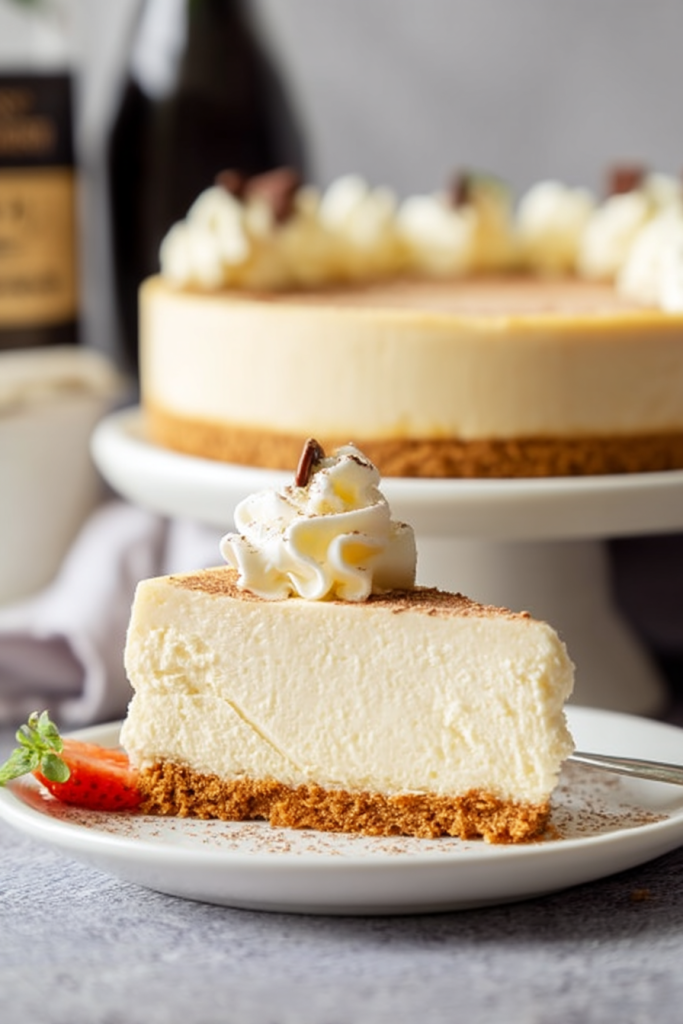
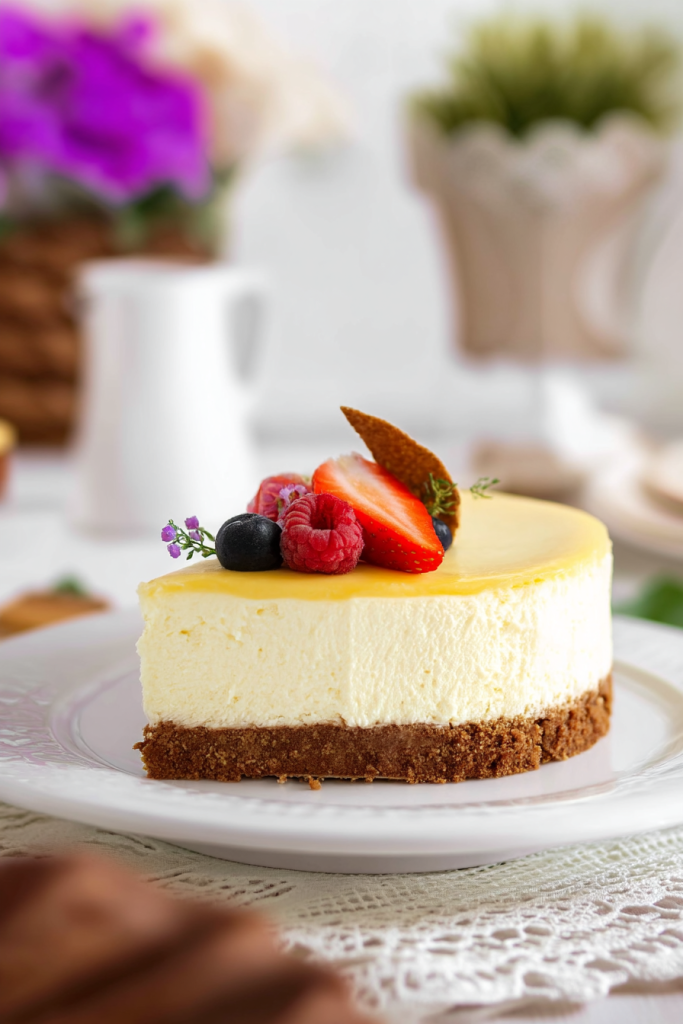
This cheesecake is absolutely delicious served plain, but feel free to get creative with toppings! Fresh berries, fruit compote, chocolate ganache, caramel sauce, or even a dollop of whipped cream all make wonderful additions. Just add them right before serving for the best presentation.
Store any leftover cheesecake in an airtight container in the refrigerator for up to 5 days. You can also freeze individual slices for up to 2 months – just wrap them tightly in plastic wrap and then aluminum foil.
FAQ’s and Troubleshooting
Why did my cheesecake crack? Cracks usually happen when cheesecakes are overcooked or cooled too quickly. Make sure to use a water bath, don’t overmix the batter once the eggs are added, and always cool your cheesecake gradually in the oven with the door cracked.
Can I make this cheesecake without a water bath? While it’s possible, I don’t recommend it. The water bath is key to even baking and helps prevent cracks by maintaining a moist environment in the oven.
Can I use light cream cheese or Greek yogurt instead of sour cream? For the best results, stick with full-fat cream cheese. You can substitute Greek yogurt for the sour cream, though the flavor will be slightly tangier.
How do I know when my cheesecake is done baking? The perfect cheesecake still has a slight wobble in the center when it’s done. The outer 2-3 inches should be set, but the center should jiggle like Jell-O when you gently shake the pan. It will continue to set as it cools.
Can I add other flavors to this cheesecake? Absolutely! This recipe is a perfect base for countless variations. Try adding lemon zest, almond extract, or even a swirl of fruit preserves before baking. You can also experiment with different crusts, like chocolate cookie or vanilla wafer.
Decorating Ideas
The beauty of a classic cream cheese cheesecake is its versatility when it comes to decorating! Here are some of my favorite ways to elevate this dessert:
• Fresh berries arranged in a beautiful pattern on top • A simple dusting of powdered sugar for an elegant touch • Chocolate curls or shavings for a bit of contrast • A drizzle of salted caramel, fruit coulis, or chocolate sauce • Whipped cream piped around the edges or in decorative rosettes • Crushed cookies, candied nuts, or toffee bits for added texture • Edible flowers for a special occasion • Mint leaves for a pop of color and fresh flavor
Remember, sometimes the simplest decoration is the most elegant – a perfectly smooth, unadorned cheesecake can be just as impressive as an elaborately decorated one!
With this foolproof recipe and these helpful tips, you’ll be making restaurant-quality cream cheese cheesecake in no time. So go ahead and indulge – you deserve it!