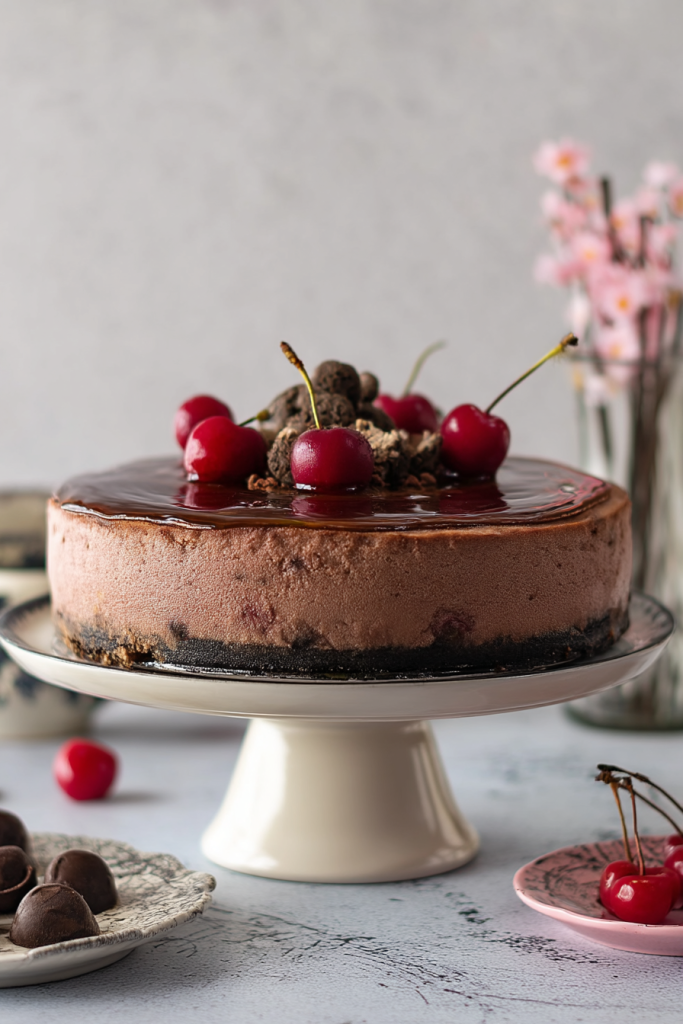
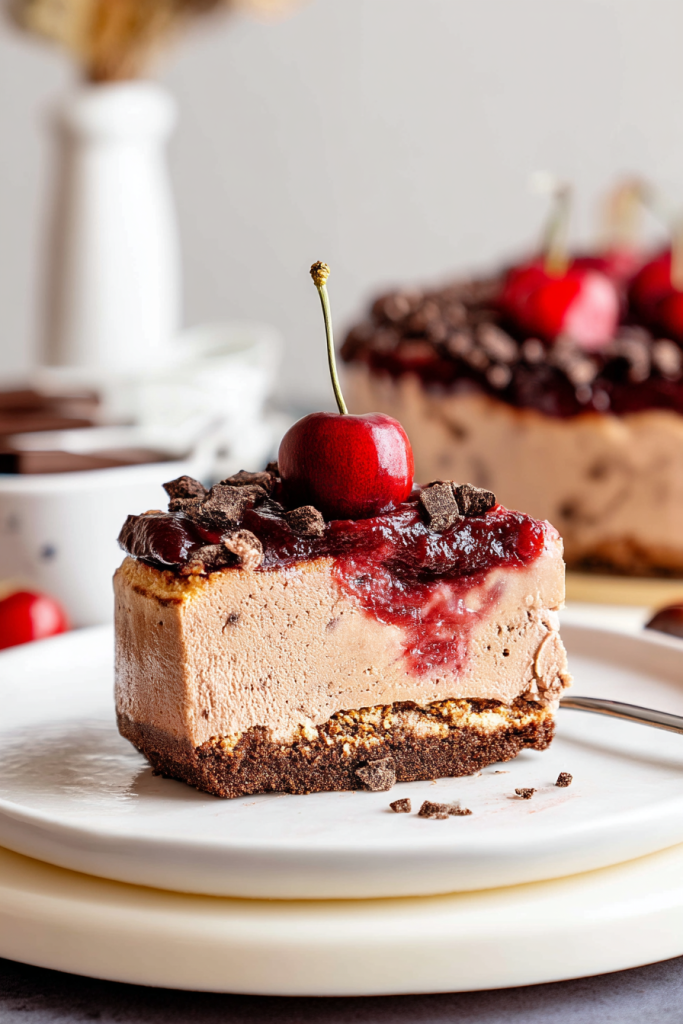
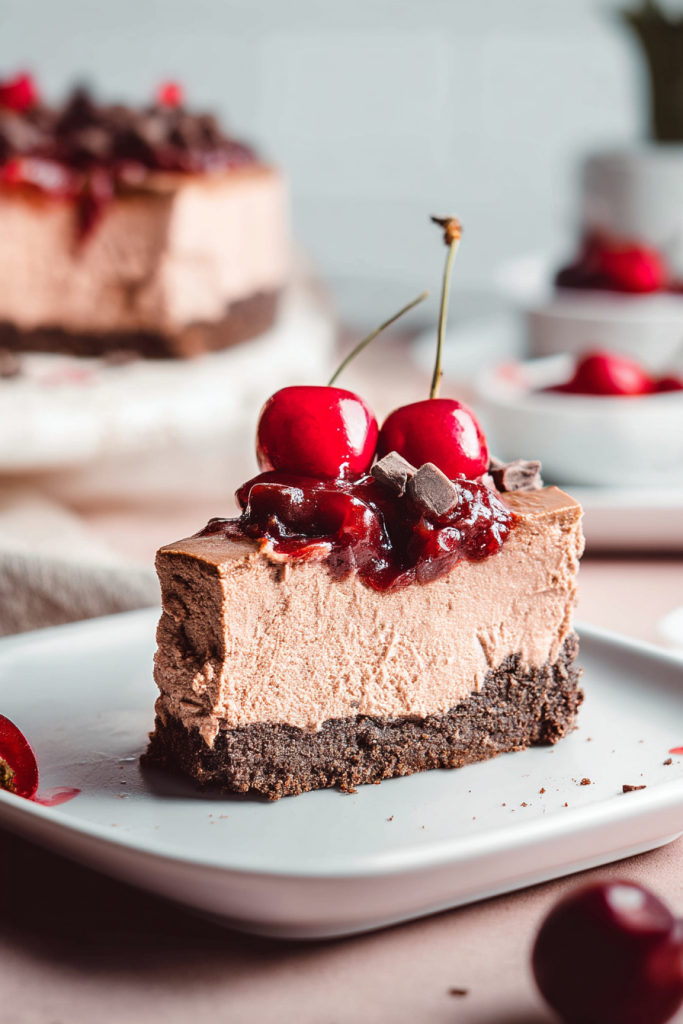
Indulge in the ultimate dessert experience with this Chocolate Cherry Cheesecake! It’s a heavenly combination of rich chocolate and sweet-tart cherries, nestled on a nutty, buttery crust that will transport your taste buds to dessert paradise. Each slice features a velvety smooth chocolate cheesecake filling swirled with luscious cherry jam, creating a decadent flavor combination that’s simply irresistible. Whether you’re celebrating a special occasion or just craving something extraordinary, this gluten-free treat delivers pure bliss in every bite. The best part? It’s easier to make than you might think and guaranteed to impress everyone at your table!
About The Recipe
When I first developed this Chocolate Cherry Cheesecake recipe, I was searching for the perfect dessert that combined two of my favorite flavors – rich chocolate and juicy cherries. After numerous test batches and tweaks to get the perfect balance, I finally created what I believe is the ultimate chocolate cherry cheesecake experience.
This isn’t just any ordinary cheesecake. The combination of dark chocolate and cherries creates a sophisticated flavor profile that’s both indulgent and refreshing. The nutty crust adds wonderful texture and depth, while the creamy filling practically melts in your mouth.
What makes this recipe special is how the chocolate and cherry flavors complement each other perfectly – the richness of the chocolate balanced by the slight tartness of the cherries. Each component works in harmony to create a dessert that feels special enough for celebrations yet delicious enough to justify making “just because.”
I’ve shared this cheesecake at countless gatherings, and it never fails to elicit rave reviews and requests for the recipe. It’s one of those desserts that looks impressive but doesn’t require professional baking skills to master!
Reasons You Will Love This Chocolate Cherry Cheesecake
- The perfect balance of rich chocolate and fruity cherry flavors
- A gluten-free nutty crust that’s both nutritious and delicious
- Stunning presentation with minimal decorating skills required
- Can be made ahead of time for stress-free entertaining
- Luxurious texture that melts in your mouth with every bite
- Natural sweetness from dates and cherries balances the dark chocolate
- Versatile serving options for different occasions
- Impressive enough for special celebrations yet simple enough for weekend treats
Equipment Needed
- 20cm (8-inch) Springform Cake Pan
- Food Processor (or alternative method for crust)
- Large Mixing Bowl
- Electric Mixer
- Rubber Spatula
- Double Boiler or Heat-Safe Bowl
- Saucepan
- Measuring Cups and Spoons
- Baking Paper
- Cooling Rack
- Refrigerator Space
Ingredients
For The Crust:
- 200g ground almonds or hazelnuts
- ½ cup desiccated coconut
- 70g butter, melted
- 6 medjool dates, stones removed Description:
- Ground Almonds/Hazelnuts – I prefer using ground almonds for their subtle flavor, but hazelnuts add a wonderful depth that pairs beautifully with chocolate. Either option creates a perfectly textured, gluten-free base.
- Desiccated Coconut – Adds delightful texture and a subtle tropical note that enhances the overall flavor profile.
- Butter – Use high-quality unsalted butter for the best results. The melted butter binds the crust ingredients together and adds richness.
- Medjool Dates – These natural sweeteners eliminate the need for refined sugar in the crust while adding caramel-like flavor and helping bind everything together.
For The Filling:
- 400g full-fat cream cheese, softened
- ⅓ cup caster sugar
- 1½ teaspoons vanilla essence or extract
- 3 free-range eggs
- 220g dark eating chocolate (60-72% cocoa)
- 250g full-fat sour cream
- ¾ cup black cherry jam or conserve Description:
- Cream Cheese – Always use full-fat cream cheese at room temperature for the smoothest texture. This creates the perfect base for our luxurious filling.
- Caster Sugar – Its fine texture dissolves quickly, ensuring a silky-smooth cheesecake without grittiness.
- Vanilla Extract – Use real vanilla extract (not essence) for the purest flavor that complements both the chocolate and cherry components.
- Free-Range Eggs – These provide structure and richness to the filling. Room temperature eggs incorporate more easily into the batter.
- Dark Chocolate – The star of the show! Use the best quality you can afford with 60-72% cocoa for deep, complex flavor without excessive bitterness.
- Sour Cream – Adds tanginess that balances the sweetness while contributing to the creamy texture.
- Cherry Jam – Creates beautiful flavor swirls throughout the cheesecake. I recommend using a high-quality jam with visible cherry pieces.
For Garnish:
- Fresh cherries, raspberries, and strawberries
- White chocolate shavings (from a chocolate bar)
- 2 tablespoons cherry jam (for drizzling)
- Cinnamon yogurt cream (optional):
- ¾ cup whipping cream
- ½-¾ cup natural unsweetened yogurt
- ¾ teaspoon cinnamon or mixed spice Description:
- Fresh Cherries – When in season, nothing beats fresh cherries for a beautiful finishing touch. Their juicy, tart-sweet flavor perfectly complements the chocolate.
- Berries – Raspberries and strawberries add vibrant color and complementary flavors.
- White Chocolate – The contrast of white chocolate shavings against the dark cheesecake creates visual appeal and a wonderful flavor counterpoint.
- Cherry Jam – A warm drizzle of the same jam used in the filling ties everything together visually and flavor-wise.
- Cinnamon Yogurt Cream – This optional accompaniment adds a touch of spice and creaminess that elevates the dessert to restaurant quality.
How To Make A Perfect Chocolate Cherry Cheesecake
Preparing The Crust
Step 1: Prepare your pan Preheat your oven to 160°C/320°F (standard bake, not fan-forced). This lower temperature is crucial for achieving that perfect cheesecake texture. Take your time greasing the springform pan thoroughly, then line both the base and sides with baking paper. I find that cutting a circle for the base and a long strip for the sides works best.
Step 2: Create the crust mixture This is where the magic begins! Place your ground almonds (or hazelnuts), desiccated coconut, melted butter, and pitted dates in a food processor. Pulse until the mixture comes together – you’ll know it’s ready when it holds together when pinched between your fingers.
No food processor? No problem! You can still achieve great results by finely chopping the dates and mixing all ingredients by hand in a large bowl. If your dates aren’t super soft, soak them in hot water for 5-10 minutes first, then drain well before using.
Step 3: Form the crust Transfer your crust mixture into the prepared springform pan. Here’s my pro tip: use the back of a large metal spoon that’s been dipped in cold water to press the mixture firmly and evenly across the base. The water prevents sticking and gives you a beautifully smooth finish. Take your time with this step – a well-formed crust is the foundation of a perfect cheesecake!
Creating The Filling
Step 1: Prepare the cream cheese mixture In a large mixing bowl, combine the softened cream cheese, caster sugar, and vanilla. I always use an electric mixer on low speed for this step – it’s essential not to incorporate too much air. Beat just until the mixture is smooth and the sugar is dissolved.
Step 2: Add the eggs Add eggs one at a time, beating on low speed after each addition until just combined. Scrape down the sides of the bowl frequently to ensure everything mixes evenly. Trust me, this patience pays off in the perfect texture!
Step 3: Prepare the chocolate-sour cream mixture This is my favorite part! Break your dark chocolate into small pieces and place in a heatproof bowl. You can melt it using either a double boiler method (bowl over simmering water) or in short bursts in the microwave. The key is gentle heat – chocolate can seize if overheated!
Once melted, remove from heat and gently fold in the sour cream using a rubber spatula. The mixture will look glossy and silky. Allow it to cool slightly – just enough so it won’t cook the eggs when added to the cream cheese mixture.
Step 4: Combine the mixtures Gradually fold the chocolate-sour cream mixture into your cream cheese mixture. I recommend using a rubber spatula and a gentle hand – we want to maintain that creamy texture without deflating what we’ve created. Mix until just combined and no streaks remain.
Step 5: Prepare the cherry jam Warm your cherry jam in a small saucepan over low heat or in the microwave for 20-30 seconds – just enough to make it pourable. This makes it easier to create those beautiful swirls throughout the cheesecake. If your jam has large cherry pieces (which add wonderful texture), keep them intact.
Assembling And Baking
Step 1: Create layers of flavor This is where we build those beautiful swirls that make this cheesecake so special! Pour half of your chocolate cheesecake mixture onto the prepared crust, spreading it gently to the edges. Then drizzle about half to three-quarters of your warmed cherry jam in a spiral pattern over the chocolate layer.
Using the tip of a knife or a wooden skewer, gently swirl the jam into the chocolate mixture with a figure-eight motion. Don’t overmix – we want distinct swirls of cherry throughout the chocolate, not a fully blended mixture.
Step 2: Complete the layers Pour the remaining chocolate cheesecake mixture on top, being careful not to disturb your beautiful swirls underneath. Smooth the surface with a spatula, then drizzle the remaining cherry jam on top. Again, create those beautiful swirls with a gentle touch.
Step 3: Create the perfect baking environment Here’s my secret for preventing cracks: place a small heatproof bowl or ramekin of water on the bottom shelf of your oven while baking. The steam creates humidity that helps your cheesecake bake evenly without drying out or cracking. It’s a game-changer!
Step 4: Bake with care Gently place your assembled cheesecake in the preheated oven and bake for approximately 1 hour. You’ll know it’s ready when the edges are set but the center still has a slight wobble – similar to how jello moves when gently shaken. Resist the urge to overbake! The cheesecake will continue to set as it cools.
Cooling and Setting
Step 1: Cool gradually Once baked, turn off the oven but leave your cheesecake inside with the door slightly ajar for about 30 minutes. This slow cooling helps prevent the dreaded crack in the center of your cheesecake. Patience is key to perfection!
Step 2: Continue cooling at room temperature After the initial cooling in the oven, remove your cheesecake and allow it to cool completely on a wire rack at room temperature. This should take approximately 1-2 hours. You’ll notice the cheesecake will continue to set during this time.
Step 3: Refrigerate for perfection The final secret to cheesecake perfection is proper chilling. Once your cheesecake has cooled to room temperature, cover it loosely with plastic wrap or foil (being careful not to touch the surface) and refrigerate for at least 4 hours – but preferably overnight. This resting period allows the flavors to meld together and the texture to become perfectly silky.
I often make my cheesecake the day before serving to ensure it has plenty of time to set. There’s something magical that happens during that long chill time – the chocolate deepens, the cherry flavor infuses throughout, and the texture becomes absolutely divine!
Serving and Garnishing
Creating a Stunning Presentation
Step 1: Prepare your canvas About 30 minutes before serving, remove your cheesecake from the refrigerator. Carefully release and remove the springform ring – I find it helps to run a thin knife around the edge first. Gently peel away the parchment paper from the sides to reveal your beautiful creation.
Step 2: Prepare the cherry drizzle In a small saucepan, warm the remaining 2 tablespoons of cherry jam until it becomes pourable. You can also do this in the microwave for 15-20 seconds. Allow it to cool slightly so it won’t melt your decorations.
Step 3: Add the final touches This is where your cheesecake truly becomes a showstopper! Arrange fresh cherries and berries artistically across the top – I like to cluster them slightly off-center for a more natural, abundant look. Use a vegetable peeler to create delicate white chocolate curls and scatter them around the fruit.
Finally, drizzle the warmed cherry jam over the top, allowing it to cascade slightly down the sides. The glossy finish catches the light beautifully and signals the incredible flavor waiting inside!
Step 4: Prepare the optional cinnamon yogurt cream If you’re serving with the cinnamon yogurt cream, whip the cream to soft peaks, then gently fold in the yogurt and cinnamon until just combined. Serve in a small bowl alongside the cheesecake for guests to add as desired. The slight tanginess and warm spice notes create a wonderful contrast to the rich chocolate and sweet-tart cherries.
Slicing Tips for Perfect Presentation
For clean, professional-looking slices, dip a long, sharp knife in hot water and wipe dry between each cut. This melts through the chocolate elements without dragging through the filling. I always slice with a gentle sawing motion rather than pushing straight down, which helps maintain those beautiful cherry swirls in each piece.
Storage and Make-Ahead Tips
How to Store Leftovers
This cheesecake keeps beautifully in the refrigerator for up to 5 days. For the best quality, I recommend placing any leftover slices in an airtight container rather than covering the entire cake with plastic wrap, which can damage the decorative toppings.
The flavor actually continues to develop over the first 2-3 days, making this the perfect make-ahead dessert for busy hosts. I’ve found that days 2-3 often deliver the most extraordinary flavor experience, as the cherry and chocolate notes have had time to fully meld.
Freezing Instructions
One of the things I love most about this cheesecake is how well it freezes! You can freeze the entire cheesecake (without toppings) or individual slices. Here’s how I do it:
- Allow the cheesecake to cool and set completely in the refrigerator overnight.
- Remove the sides of the springform pan and place the cheesecake (still on the base) in the freezer for 1-2 hours until firm.
- Once firm, wrap the cheesecake tightly in a double layer of plastic wrap followed by aluminum foil.
- Freeze for up to 3 months.
- When ready to serve, thaw overnight in the refrigerator, then add fresh toppings.
Individual slices can be wrapped similarly after the initial freezing. This makes for perfect portion control – and ensures I always have an impressive dessert ready for unexpected guests!
FAQ’s and Troubleshooting
Why did my cheesecake crack?
Cracking is typically caused by three main factors: overmixing (which incorporates too much air), overbaking (which dries out the filling), or rapid temperature changes. To prevent cracks:
- Always mix on low speed, especially after adding eggs
- Look for the slight wobble in the center when testing for doneness
- Use the water bath method I described
- Follow the gradual cooling process precisely
If you do get a crack, don’t worry! Simply cover it with your beautiful fruit arrangement – no one will ever know!
Can I use a different type of chocolate?
Absolutely! While I prefer dark chocolate (60-72% cocoa) for its rich flavor that balances perfectly with the sweet cherries, you can use semi-sweet or even milk chocolate if you prefer a sweeter profile. Just be aware that milk chocolate will create a softer set, so you might need to extend the refrigeration time.
My dates are very dry. Will they still work?
Dry dates can still work beautifully, but they need a little help first. Simply soak them in hot water for 10-15 minutes, then drain thoroughly before adding to the food processor. The extra moisture will help them blend smoothly into the crust mixture and create the perfect binding texture.
Can I make this without a springform pan?
While a springform pan is ideal, you can adapt this recipe to use a deep pie dish or cake pan with straight sides. Line it completely with parchment paper, leaving overhanging “handles” to help lift the cheesecake out after cooling. Be aware that a different pan may affect baking time – start checking for doneness about 10 minutes earlier.
Can I make this without the cherry jam?
Certainly! The chocolate cheesecake base is absolutely delicious on its own. You could also substitute another fruit preserve like raspberry, blackberry, or even orange marmalade for a different flavor profile while maintaining that wonderful contrast with the chocolate.
Final Tips for Success
After making this cheesecake countless times, I’ve discovered a few final tips that make all the difference:
- Quality ingredients matter: Especially the chocolate and cherry jam – these flavors shine through and define the entire experience.
- Room temperature dairy: Make sure your cream cheese, eggs, and sour cream are all at room temperature before beginning. This ensures smooth incorporation without overbeating.
- Trust your instincts: Every oven is different, so use the visual cues I’ve described rather than just the timer to determine doneness.
- Make it personal: Once you’ve mastered the basic recipe, don’t be afraid to experiment with different chocolate varieties or complementary flavors like almond extract or a splash of cherry liqueur!
I hope you enjoy making and sharing this Chocolate Cherry Cheesecake as much as I do. It’s truly a labor of love that rewards you with something extraordinary – a dessert that creates moments of pure bliss around your table. Happy baking!