Let me tell you about the most incredible dessert that’s been taking my kitchen (and my taste buds) by storm – the Biscoff Cheesecake. If you’re a fan of that magical cookie butter spread that turns ordinary desserts into extraordinary experiences, this recipe is going to change your life.
The Biscoff Obsession: More Than Just a Cookie
Biscoff cookies have a way of capturing hearts with their caramelized, speculoos-style charm. But when you transform these crisp, spiced cookies into a decadent cheesecake, something truly magical happens. It’s not just a dessert; it’s an experience that combines the creamy richness of cheesecake with the unmistakable warmth of Biscoff cookies.
Why This Cheesecake is Different
Most cheesecakes are good, but this Biscoff Cheesecake? It’s spectacular. The secret lies in the carefully crafted layers of flavor:
- A crunchy Biscoff cookie crust that provides the perfect textural contrast
- A silky-smooth cream cheese filling infused with cookie butter
- A dreamy topping that celebrates the essence of Biscoff
The Inspiration Behind the Recipe
As a passionate baker, I’ve always been on the hunt for desserts that tell a story. This Biscoff Cheesecake isn’t just a recipe; it’s a celebration of flavors that dance together in perfect harmony. The idea came to me during one of those late-night baking experiments where creativity meets pure indulgence.
Imagine taking the beloved Biscoff cookie – that caramelized, spiced treat that’s become a global sensation – and transforming it into a cheesecake that’s both sophisticated and comforting. That’s exactly what we’re about to do.
In the next sections, I’ll walk you through every single step of creating this show-stopping dessert. From the precise technique of creating the perfect crust to the careful method of baking a crack-free cheesecake, you’ll become a Biscoff Cheesecake master.
Are you ready to embark on this delicious journey?
Gathering Your Biscoff Cheesecake Arsenal: Ingredients Breakdown
Let’s talk ingredients – the building blocks of our culinary masterpiece. Each component is carefully selected to create a cheesecake that’s nothing short of extraordinary.
For the Irresistible Biscoff Crust
- 250 grams Biscoff cookies (about one full package)
- 1/3 cup (75 grams) unsalted butter
The crust is where the magic begins. Those golden, caramelized Biscoff cookies will be transformed into a crumb base that’s both crispy and buttery. Pro tip: Use a food processor to create the most uniform cookie crumbs possible.
The Creamy Cheesecake Filling
- 907 grams (4 packages of 8 oz) cream cheese, softened to room temperature
- 1 cup (200 grams) brown sugar
- 1/4 cup (50 grams) granulated sugar
- 1/2 cup (120 grams) sour cream
- 1 cup (240 grams) Biscoff cookie butter
- 1 tablespoon vanilla extract
- 1/4 teaspoon salt
- 4 large eggs, room temperature
Each ingredient plays a crucial role. The combination of brown and granulated sugars creates depth of flavor, while the sour cream ensures a luxuriously smooth texture. The star of the show? That cup of Biscoff cookie butter that infuses every bite with that iconic speculoos flavor.
Decorative Finishing Touches
- 1/2 cup Biscoff spread
- 1/4 cup Biscoff cookies, crumbled
These final touches are what transform a great cheesecake into an Instagram-worthy dessert. The melted Biscoff spread drizzled on top and the crumbled cookies around the edges are more than just decoration – they’re a promise of the deliciousness that awaits.
The Secret to Success: Room Temperature Ingredients
Before we dive into the method, let me share a baker’s secret: ensure all your ingredients are at room temperature. This is especially true for the cream cheese and eggs. Room temperature ingredients blend more smoothly, creating a silky-smooth cheesecake filling that’s free from lumps.
The Art of Crafting the Perfect Biscoff Cheesecake: Step-by-Step Guide
Baking a cheesecake is part science, part art, and 100% delicious passion. I’m going to walk you through each step, sharing the insider tips that transform a good cheesecake into an absolutely phenomenal one.
Preparing the Biscoff Cookie Crust
- Crush with Precision: Start by placing those Biscoff cookies in a food processor. The goal is to create fine, uniform crumbs that will form the foundation of our cheesecake. Process until you have a sandy, consistent texture.
- Butter Binding: Melt the butter and mix it thoroughly with the cookie crumbs. The mixture should hold together when pressed – think of the consistency of wet sand. This is your secret weapon for a crust that’s crisp yet holds its shape.
- Crust Creation: Press the mixture firmly into the bottom of an 8″ or 9″ cheesecake pan. Pro tip: If using an 8″ pan, ensure it’s deep. A quick 10-minute bake at 325°F will help set this golden, fragrant base.
Mastering the Biscoff Cheesecake Filling
The filling is where the magic truly happens. Each step is crucial:
- Cream Cheese Technique: Beat the cream cheese for a full 3 minutes at medium speed. This isn’t just mixing – it’s creating a smooth, lump-free foundation. Patience is key here.
- Sugar Integration: Add both brown and granulated sugars, beating for another 2 minutes. This isn’t just about sweetness – it’s about creating a complex flavor profile that makes your cheesecake unforgettable.
- Flavor Layers: Incorporate the sour cream and Biscoff cookie butter. This is where the signature flavor develops. Scrape down the bowl frequently – those little bits matter!
- Egg Addition: Here’s a critical moment. Add eggs one at a time, mixing just until combined. Overmixing at this stage can lead to a cracked, dense cheesecake – and we’re aiming for silky perfection.
The Water Bath: Your Cheesecake’s Best Friend
The water bath might seem like an extra step, but trust me – it’s the secret to a crack-free, creamy cheesecake:
- Wrap the bottom of the pan in several layers of foil.
- Place the cheesecake pan in a larger roasting pan.
- Pour hot water around the cheesecake pan, creating a gentle, even heat environment.
Baking and Cooling: The Patience Game
- Bake at 325°F for 60-70 minutes
- Look for a slight jiggle in the center – it should wobble like jelly, not slosh like liquid
- Turn off the oven and let the cheesecake sit for an hour
- Refrigerate for at least 6 hours (overnight is even better)
The Tell-Tale Signs of a Perfect Cheesecake
You’ll know you’ve nailed it when:
- The edges are set but the center has a gentle wobble
- The top is smooth and crack-free
- The texture is creamy, not grainy
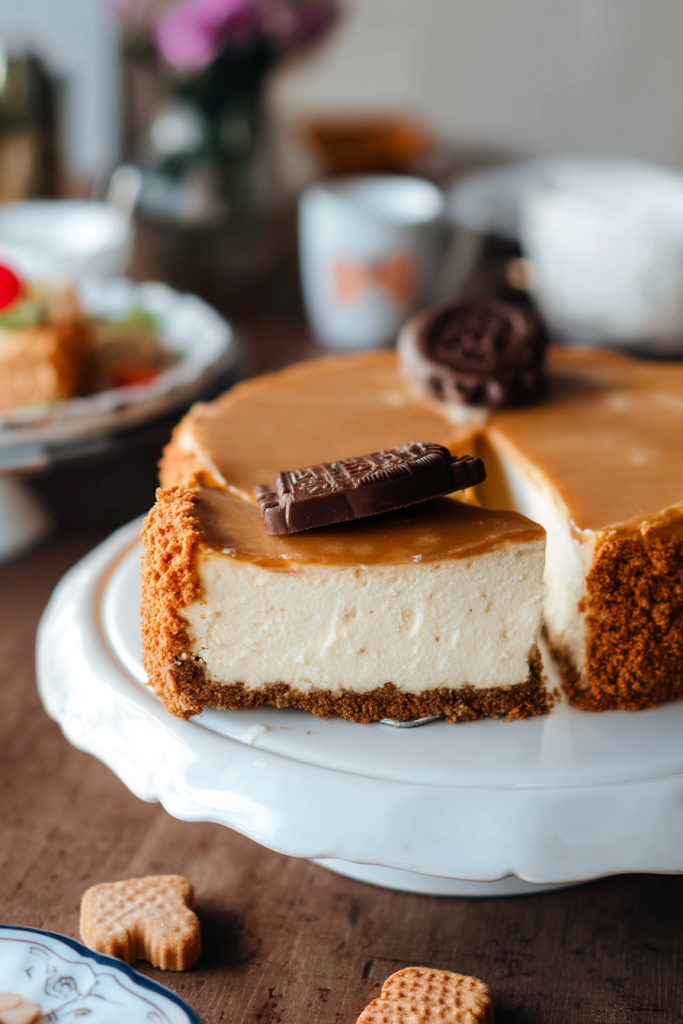
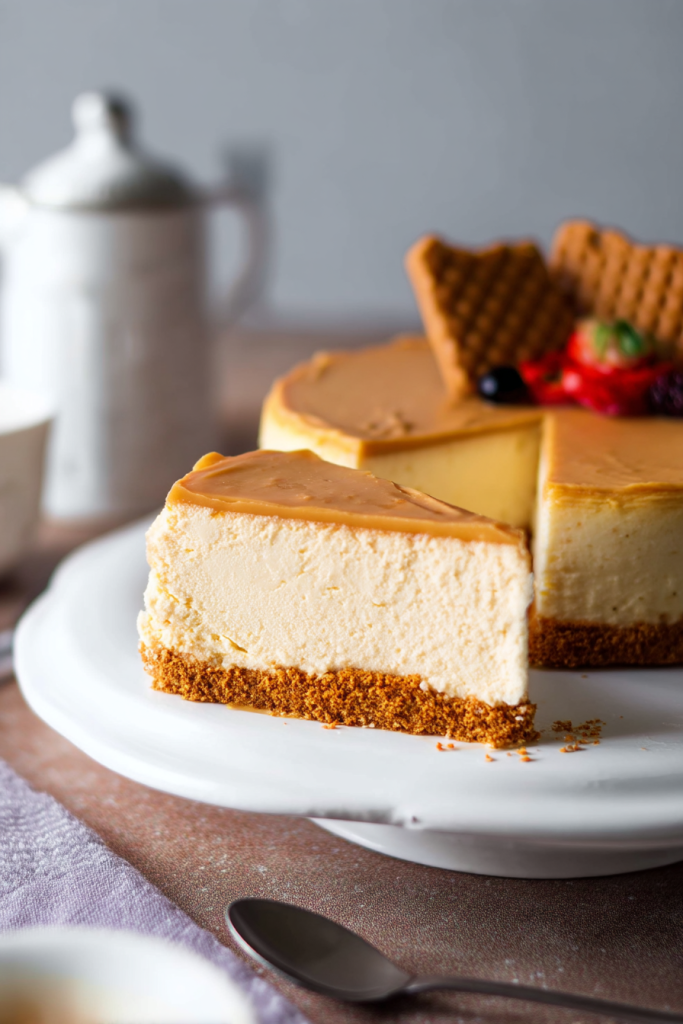
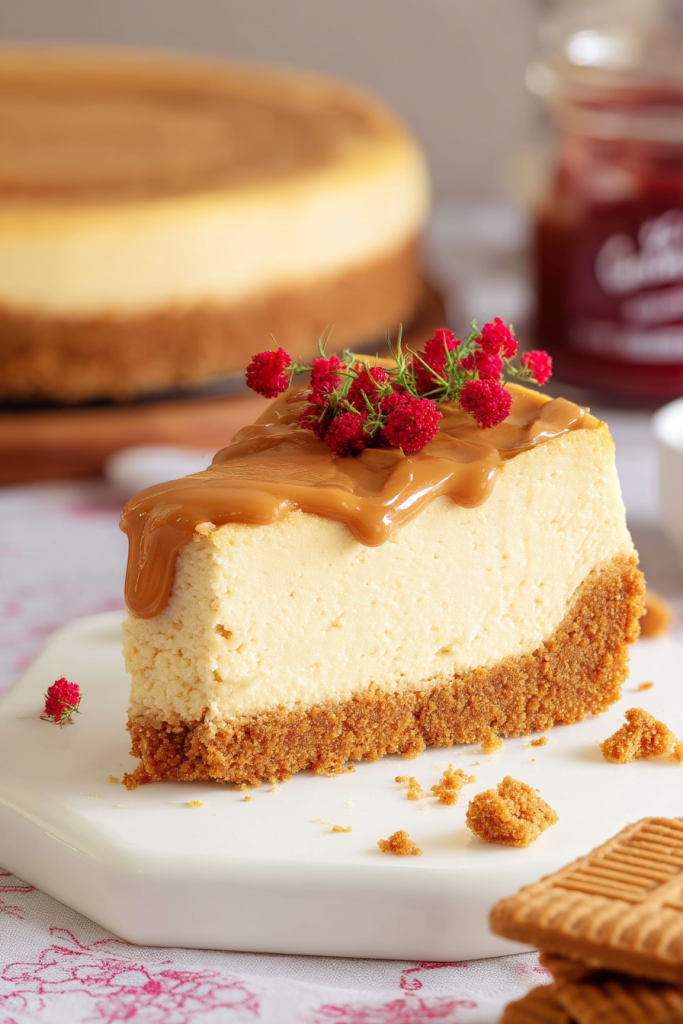
Decoration: The Crowning Glory
The final touch is pure Biscoff magic:
- Melt Biscoff spread until it’s delightfully runny
- Pour and spread over the chilled cheesecake
- Sprinkle crushed Biscoff cookies around the edges
Pro Baker’s Wisdom: Perfection takes practice. Your first cheesecake might not be Instagram-perfect, but it will absolutely be delicious. Each time you make this, you’ll get better and better.
Serving, Storing, and Savoring Your Biscoff Cheesecake Masterpiece
After all your hard work, let’s talk about the best parts – enjoying and preserving your incredible creation.
Serving Suggestions
The moment of truth has arrived! Here are some pro tips to make your Biscoff Cheesecake truly unforgettable:
- Let the cheesecake sit at room temperature for about 15-20 minutes before serving. This softens the texture just enough to create the most luxurious mouthfeel.
- Use a hot, clean knife to slice. Wipe the knife between each cut for those picture-perfect, clean slices.
- Pair with a strong coffee or a shot of espresso. The bitter notes complement the sweet, spiced Biscoff flavor beautifully.
- For an extra indulgence, add a dollop of whipped cream or a drizzle of caramel sauce.
Storage Secrets
Proper storage is key to maintaining that perfect cheesecake texture:
- Refrigerator Storage: Your Biscoff Cheesecake will happily live in the fridge for 4-5 days. Always store in an airtight container to prevent it from absorbing other flavors.
- Freezer Magic: Believe it or not, this cheesecake freezes like a dream!
- Wrap it tightly in plastic wrap
- Place in an airtight container
- It will keep for up to 2 months in the freezer
Freezing Tip: Freeze the entire cheesecake or slice it into individual portions for easy future indulgence. Pro move for those moments when a cheesecake craving strikes!
Troubleshooting Common Cheesecake Challenges
Even the most experienced bakers encounter hiccups. Here are some quick fixes:
- Cracked Top: Often caused by overmixing or sudden temperature changes. The water bath method we discussed helps prevent this.
- Soggy Crust: Ensure your crust is fully cooled before adding the filling, and consider a light pre-bake.
- Uneven Baking: Rotate the pan halfway through baking to ensure even heat distribution.
Why This Biscoff Cheesecake is More Than Just a Dessert
This isn’t just a recipe – it’s an experience. Each bite tells a story of caramelized cookies, creamy cheese, and pure indulgence. It’s the kind of dessert that turns an ordinary evening into a celebration, that makes people close their eyes and savor the moment.
Final Thoughts
Baking is an act of love. When you make this Biscoff Cheesecake, you’re not just creating a dessert – you’re creating memories. Whether it’s for a special occasion or a random Tuesday night treat, this cheesecake is guaranteed to bring joy.
A few last-minute words of wisdom:
- Bake with patience
- Measure precisely
- Don’t be afraid to make it your own
Your kitchen, your rules. And trust me, once you’ve mastered this Biscoff Cheesecake, you’ll be the dessert hero among your friends and family.
Bon Appétit!
Notes for the Adventurous Baker
- Experiment with different Biscoff cookie decorations
- Try a chocolate drizzle for an extra layer of decadence
- Consider making mini cheesecakes for portion-controlled indulgence
Remember, the best recipes are the ones you make your own. So go ahead, dive in, and create something delicious!