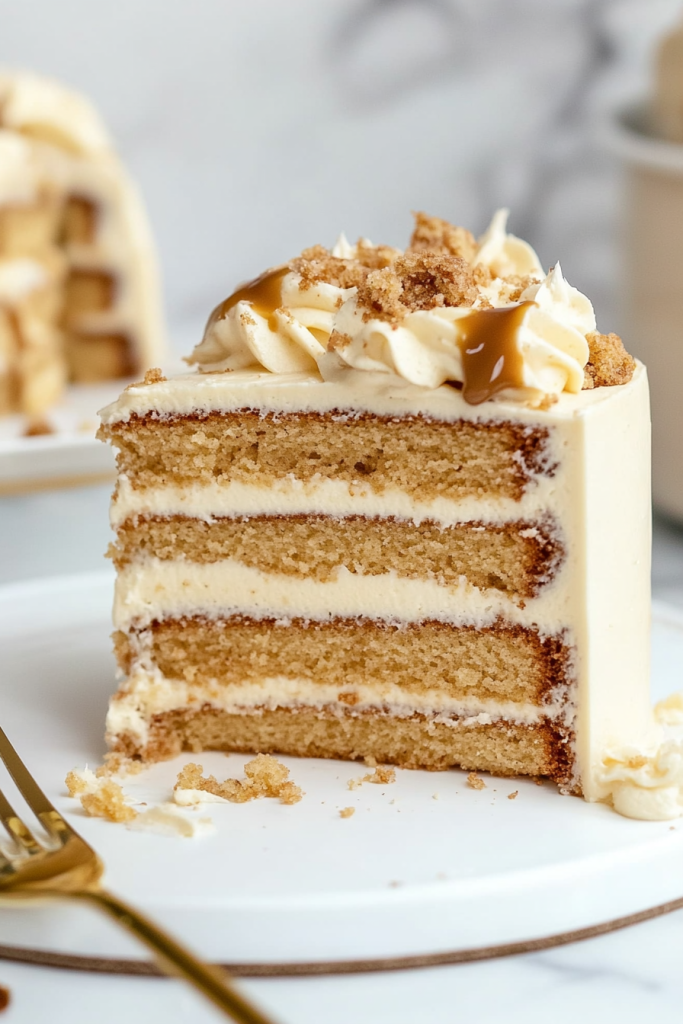
If you’re a fan of cookie butter, you’re in for a treat! This Cookie Butter Layer Cake is pure indulgence—three soft, fluffy vanilla cake layers sandwiched with a rich and creamy Biscoff buttercream frosting. With a hint of caramelized spice from Speculoos cookies and a melt-in-your-mouth texture, this cake is perfect for any celebration. Whether it’s a birthday, holiday, or just a sweet craving, this cake is bound to impress!
About This Recipe
I’ve always been obsessed with cookie butter—the smooth, spiced spread made from crushed Speculoos cookies. There’s something about its caramel-like depth and warm cinnamon notes that makes it irresistible. So naturally, I had to turn it into a cake!
This Cookie Butter Layer Cake features:
- Moist vanilla cake layers that are soft, fluffy, and not overly sweet.
- Luscious Biscoff buttercream—a silky, not-too-sweet frosting with a rich cookie butter flavor.
- Crunchy cookie butter filling—a surprise layer of crunchy cookie butter between each cake layer for texture.
- Crushed Speculoos cookies sprinkled on top for a bit of crunch and a decorative touch.
Every bite is a perfect balance of sweet, spiced, creamy, and crunchy. If you love cookie butter, this cake is a dream come true!
Reasons You’ll Love This Cookie Butter Cake
- Soft & Moist Layers – The vanilla cake base is tender and perfectly fluffy.
- Easy to Make – While it looks fancy, this cake is totally achievable at home.
- Cookie Butter Lovers’ Dream – Packed with cookie butter flavor in every bite.
- Perfect for Special Occasions – This cake is a showstopper and will impress any crowd.
Ingredients & Equipment Needed
Before we dive into the step-by-step process, let’s go over the essential ingredients and tools you’ll need to create this Cookie Butter Layer Cake.
Equipment Needed
To ensure your cake turns out perfectly, here are the tools you’ll need:
- Three 6-inch cake pans – To create the stunning layered look.
- Parchment paper – Prevents the cake from sticking to the pans.
- Mixing bowls – For preparing the cake batter and frosting.
- Stand mixer or hand mixer – Helps achieve a smooth and airy batter.
- Whisk & spatula – Essential for mixing and folding ingredients.
- Offset spatula – For frosting the cake with precision.
- Cake turntable (optional) – Makes decorating much easier.
Ingredients for the Cake
These simple ingredients create a soft, moist vanilla cake base that pairs perfectly with the cookie butter frosting.
- 2¼ cups all-purpose flour – Provides structure to the cake.
- 2¼ teaspoons baking powder – Ensures a light and fluffy texture.
- ¾ teaspoon salt – Balances the sweetness.
- ¾ cup unsalted butter (room temperature) – Adds richness and moisture.
- 1½ cups granulated sugar – Sweetens the cake just right.
- 3 large eggs (room temperature) – Helps create a tender crumb.
- 1½ teaspoons vanilla extract – Enhances the flavor.
- 1 cup whole milk (room temperature) – Keeps the cake moist and soft.
Ingredients for the Biscoff Buttercream
This frosting is ultra-creamy, not too sweet, and loaded with cookie butter flavor.
- 5 large egg whites – The base for a silky, fluffy buttercream.
- 1¼ cups granulated sugar – Sweetens the frosting.
- 1½ cups unsalted butter (room temperature, cubed) – Creates a creamy, rich texture.
- ½ cup smooth cookie butter – The star ingredient, adding that signature spiced flavor.
For the Assembly & Decoration
- Crunchy cookie butter – Spread between cake layers for extra texture.
- Speculoos cookies (crushed, optional) – A decorative, crunchy topping.
How to Make the Cookie Butter Layer Cake
Now that we have all the ingredients and tools ready, it’s time to bring this delicious Cookie Butter Layer Cake to life! This step-by-step guide will walk you through making the cake layers, preparing the frosting, and assembling the final masterpiece.
Step 1: Bake the Vanilla Cake Layers
- Preheat & Prepare the Pans – Preheat your oven to 350°F (175°C). Grease three 6-inch cake pans, line them with parchment paper, and lightly flour them to prevent sticking.
- Mix Dry Ingredients – In a medium bowl, whisk together the flour, baking powder, and salt. Set aside.
- Cream the Butter & Sugar – Using a stand mixer (or hand mixer), beat the butter until smooth. Add the sugar and beat on medium-high speed for about 2-3 minutes, until the mixture is pale and fluffy.
- Incorporate the Eggs & Vanilla – Reduce the mixer speed to low and add the eggs, one at a time, mixing well after each addition. Stir in the vanilla extract.
- Alternate Dry & Wet Ingredients – Add the flour mixture in three additions, alternating with the milk in two additions (starting and ending with the dry ingredients). Mix until just combined—don’t overmix!
- Divide & Bake – Evenly divide the batter among the prepared cake pans, smoothing the tops with a spatula. Bake for 25-30 minutes, or until a toothpick inserted in the center comes out clean.
- Cool Completely – Let the cakes cool in their pans for about 10 minutes, then transfer them to a wire rack to cool completely before assembling.
Step 2: Make the Biscoff Buttercream
- Prepare the Egg White Mixture – Place the egg whites and sugar in the bowl of a stand mixer. Whisk them together lightly.
- Heat Until Smooth – Set the bowl over a pot of simmering water (double boiler method) and whisk constantly until the mixture reaches 160°F (71°C) or until the sugar has fully dissolved (no graininess when rubbed between fingers).
- Whip Until Stiff Peaks Form – Transfer the bowl to the stand mixer fitted with the whisk attachment. Beat on medium-high speed for 5-10 minutes, or until the meringue is glossy and forms stiff peaks. The bowl should feel cool to the touch.
- Add Butter Gradually – Switch to the paddle attachment and add the butter, one cube at a time, beating well after each addition. The mixture might look curdled at first, but keep mixing—it will turn into smooth buttercream!
- Incorporate Cookie Butter – Add the cookie butter and mix until fully combined and silky.
How to Assemble & Decorate the Cookie Butter Layer Cake
Now that our cake layers are completely cooled and the Biscoff buttercream is smooth and ready, it’s time to put everything together! This step ensures that every bite of the cake is perfectly balanced with soft layers, creamy frosting, and just the right amount of crunch.
Step 1: Layer the Cake with Cookie Butter Filling
- Trim & Level the Cakes (Optional) – If needed, use a serrated knife to trim the domed tops of each cake layer to ensure an even stack.
- Spread the Crunchy Cookie Butter – Place the first cake layer on a cake stand or serving plate. Spread a thin layer of crunchy cookie butter on top. This adds a surprise crunch between layers!
- Add Buttercream & Stack – Spread about ⅔ cup of Biscoff buttercream over the cookie butter layer, smoothing it evenly with an offset spatula.
- Repeat with Remaining Layers – Place the second cake layer on top and repeat the process—spread a layer of crunchy cookie butter followed by a layer of frosting. Finally, place the third cake layer on top.
Step 2: Crumb Coat & Chill
- Apply a Thin Crumb Coat – Spread a thin layer of frosting over the entire cake to seal in the crumbs. This doesn’t have to be perfect—it’s just the base coat!
- Chill for 20 Minutes – Place the cake in the fridge for about 20 minutes to firm up the crumb coat. This helps create a smooth final layer of frosting.
Step 3: Frost & Decorate
- Final Frosting Layer – Using an offset spatula, spread the remaining buttercream evenly over the cake, smoothing the top and sides. A cake scraper can help achieve a clean finish.
- Decorate with Crushed Speculoos Cookies – Sprinkle crushed Speculoos cookies around the edges or press them into the sides of the cake for an extra crunch.
- Pipe Buttercream Rosettes (Optional) – If you have leftover frosting, pipe decorative swirls or rosettes on top using a piping bag with a star tip.
- Final Drizzle of Cookie Butter (Optional) – For extra decadence, melt a little cookie butter and drizzle it over the cake for a beautiful finishing touch.
Storage, FAQs & Troubleshooting
Now that your Cookie Butter Layer Cake is beautifully assembled and ready to enjoy, let’s go over some important storage tips, common troubleshooting issues, and FAQs to ensure you get the best results every time!
How to Store Cookie Butter Layer Cake
Whether you’re making this cake ahead of time or saving leftovers, here’s how to keep it fresh:
- At Room Temperature – Store the cake in an airtight container or cake dome at room temperature for up to 2 days.
- In the Refrigerator – For longer storage, keep the cake covered in the fridge for up to 5 days. Let it come to room temperature before serving for the best texture.
- Freezing the Cake – You can freeze the cake layers (before assembling) by wrapping them in plastic wrap and storing them in an airtight container for up to 3 months. Thaw them in the fridge overnight before frosting.
FAQs & Common Troubleshooting
1. Can I Use a Different Frosting?
Absolutely! While the Biscoff buttercream is the star here, you can switch it up with:
- Cream cheese frosting for a tangy contrast.
- Chocolate buttercream for a rich, indulgent twist.
- Salted caramel buttercream for extra sweetness with a hint of salt.
2. Can I Make Cupcakes Instead of a Layer Cake?
Yes! Simply divide the batter into lined cupcake tins, filling each about ¾ full. Bake at 350°F (175°C) for 18-20 minutes, or until a toothpick comes out clean.
3. Why is My Cake Dry or Crumbly?
Dry cakes can happen due to:
- Overmixing – Be sure to mix until just combined.
- Overbaking – Check for doneness a few minutes before the recommended time.
- Incorrect measuring – Spoon and level your flour instead of scooping it directly from the bag.
4. How Can I Make My Buttercream Extra Smooth?
- Make sure the butter is at room temperature before beating.
- Sift the powdered sugar (if using) to avoid lumps.
- If your buttercream looks curdled, keep mixing! It usually comes together after a few minutes.
Final Thoughts
This Cookie Butter Layer Cake is everything a dessert should be—moist, creamy, slightly crunchy, and packed with that signature Biscoff flavor. Whether you’re baking it for a special occasion or just because, it’s guaranteed to be a crowd favorite!
If you try this recipe, let me know how it turns out—I’d love to hear your thoughts!