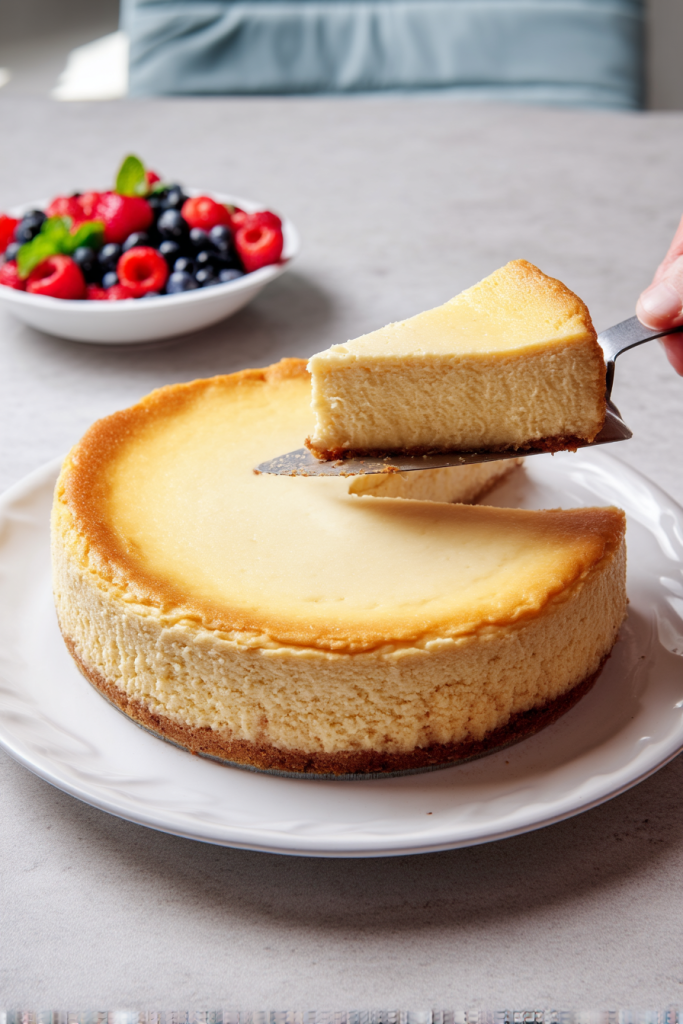
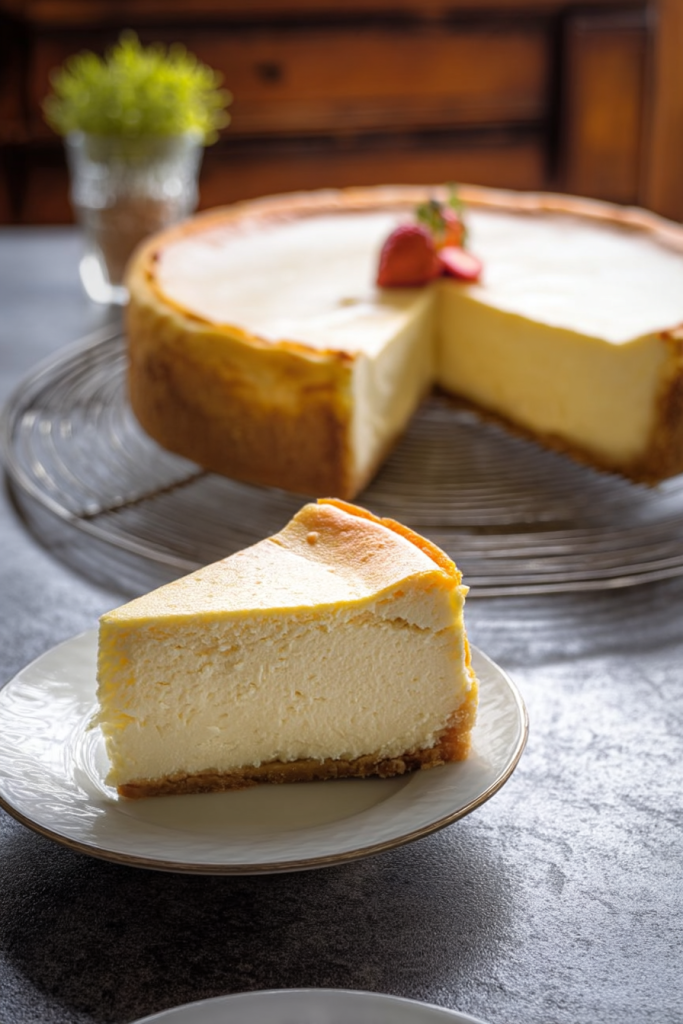
The quintessential dessert that’s perfect for any celebration or indulgent treat – Perfect Creamy Cheesecake with Graham Cracker Crust! It’s everything you’ve been craving, but made even better. A buttery graham cracker crust topped with a silky-smooth, rich cheesecake filling that’s decadently creamy and perfectly balanced. Every bite is velvety smooth, wonderfully sweet, and truly melt-in-your-mouth divine! It’s the ideal dessert to serve at dinner parties, special occasions, holidays, or just whenever you’re craving something luxuriously delicious. The best part? It’s much easier to make than you might think and guaranteed to impress everyone who tries it!
About The Recipe
Sometimes, all you need is a slice of perfect creamy cheesecake to elevate any occasion. When I realized I hadn’t shared my go-to cheesecake recipe that consistently receives rave reviews at family gatherings, I knew I had to remedy that immediately!
This isn’t just any ordinary cheesecake, though. This cheesecake surpasses anything you’ll find at your local bakery or restaurant (no offense to them!).
When developing this recipe, I wanted to create a cheesecake that would stand above all others. I was looking for something incredibly creamy, perfectly set, not overly sweet, with that perfect balance of richness and tang. The journey wasn’t simple, I must admit.
I’ve never tested so many cheesecake variations! From adjusting ingredient ratios, baking temperatures, cooling techniques, and pan sizes – I did it ALL so you could enjoy the ultimate creamy cheesecake experience!
After much testing and countless tastings (somebody had to do it!), I finally arrived at what I believe to be the most sublime cheesecake recipe.
And the greatest part? This cheesecake is guaranteed to impress anyone who tries it!
Every bite is perfectly sweetened without being cloying, velvety smooth, incredibly creamy, with just the right balance between the buttery graham cracker crust and luscious, rich filling. It will definitely leave you reaching for a second slice!
Reasons You Will Love This Creamy Cheesecake
- A timeless classic that never disappoints.
- Perfect balance of tangy and sweet flavors.
- Incredibly smooth and creamy texture that melts in your mouth.
- Practically foolproof with my special baking technique.
- No cracks with my gradual cooling method.
- Incredibly versatile for toppings and flavor variations.
- The ideal make-ahead dessert for any celebration or gathering!
- Always impresses guests despite being easier to make than it looks.
- Stores beautifully, so you can enjoy it for days!
Equipment Needed
- 8 or 9-inch Springform Pan
- Parchment Paper
- Mixing Bowls
- Electric Hand Mixer or Stand Mixer
- Measuring Cups and Spoons
- Straight-Edged Glass or Measuring Cup (for pressing crust)
- Large Rimmed Baking Sheet or 9×13 Baking Pan (for water bath)
- Wire Cooling Rack
- Offset Spatula or Thin Knife
Ingredients
For The Graham Cracker Crust:
- 1¼ cups graham cracker crumbs
- 2 tablespoons packed light brown sugar
- 4 tablespoons unsalted butter, melted
Description:
- Graham Cracker Crumbs – The foundation of our crust that provides the perfect contrast to the creamy filling. You can buy pre-made crumbs or crush your own.
- Light Brown Sugar – Adds a subtle caramel note to the crust that pairs beautifully with the vanilla filling.
- Unsalted Butter – Binds everything together and adds richness to our base. Make sure it’s fully melted for even distribution.
For The Vanilla Cheesecake Filling (8-inch pan):
- 500g cream cheese (2 blocks), room temperature
- ¾ cup granulated sugar
- 2 tablespoons warm water (or 1 tablespoon water + 1 tablespoon lemon juice)
- ⅓ cup plus 1 tablespoon full-fat sour cream, room temperature
- 1½ teaspoons pure vanilla extract
- 1 teaspoon vanilla bean paste (optional)
- 2 large eggs, room temperature
Note: For a 9-inch pan, use the larger quantities as specified in the ingredients list below.
Description:
- Cream Cheese – The star of our cheesecake! Always use full-fat, brick-style cream cheese for the best texture and flavor.
- Granulated Sugar – Provides just the right amount of sweetness to balance the tangy cream cheese.
- Warm Water/Lemon Juice – Helps create that perfect silky texture. The optional lemon juice adds a subtle brightness that enhances the vanilla.
- Full-Fat Sour Cream – The secret to an extra creamy cheesecake with a slight tang.
- Vanilla Extract – The primary flavor component that makes this cheesecake so special.
- Vanilla Bean Paste – Optional but highly recommended for those gorgeous flecks of real vanilla bean that elevate both appearance and flavor.
- Eggs – Provide structure and richness to our filling. Room temperature is crucial for proper incorporation.
For The Vanilla Cheesecake Filling (9-inch pan):
- 750g cream cheese (3 blocks), room temperature
- 1 cup plus 2 tablespoons granulated sugar
- 3 tablespoons warm water (or 1 tablespoon water + 2 tablespoons lemon juice)
- ⅔ cup full-fat sour cream, room temperature
- 2 teaspoons pure vanilla extract
- 1½ teaspoons vanilla bean paste (optional)
- 3 large eggs, room temperature
How To Make A Perfect Vanilla Cheesecake
Instructions for the Crust
Step 1: Prepare your pan and oven Preheat your oven to 350°F. Lightly grease the sides of your springform pan (8-inch or 9-inch) and line the bottom with a round of parchment paper. This preparation ensures easy removal later.
Step 2: Make the graham cracker crust In a medium bowl, combine graham cracker crumbs, brown sugar, and melted butter. Mix until everything is evenly moistened and resembles wet sand. The mixture should clump together when pressed between your fingers.
Step 3: Press and pre-bake the crust Transfer the crumb mixture into your prepared springform pan. Using a straight-edged drinking glass or the bottom of a measuring cup, firmly press the crumbs into an even layer on the bottom and about ½-inch up the sides of the pan. For a 9-inch pan, you’ll have just enough for a flat bottom crust. Bake for 10-12 minutes until lightly golden and dry to the touch. This pre-baking step ensures a crisp, non-soggy foundation.
Instructions for the Filling
Step 1: Adjust oven and prepare for baking Reduce the oven temperature to 300°F. Place a large metal rimmed baking sheet or 9×13-inch baking pan on the bottom rack of your oven. We’ll add water to this later to create a steam bath that helps prevent cracks.
Step 2: Beat cream cheese until smooth In a large bowl, beat the cream cheese with an electric mixer on medium speed until completely smooth, about 2-3 minutes. This is a crucial step – any remaining lumps now will remain in your final cheesecake!
Step 3: Add sugar and create a smooth base Gradually add the sugar while continuing to beat at medium speed. Beat until the mixture is very smooth and creamy, stopping frequently to scrape down the sides and bottom of the bowl. The mixture must be completely lump-free before proceeding.
Step 4: Add remaining wet ingredients Add the water (and lemon juice if using) and mix until smooth. Then mix in the sour cream, vanilla extract, and vanilla bean paste (if using) until just combined. Scrape down the sides and bottom of the bowl again, then mix on low for 5 seconds to ensure everything is perfectly blended.
Step 5: Incorporate eggs Add one egg and beat on medium speed until JUST combined – do not overmix. Scrape down the bowl again, add the second egg (and third if using a 9-inch pan), and beat just until incorporated. Overmixing after adding eggs can incorporate too much air, which can cause cracks.
Step 6: Prepare for baking Pour the batter onto the pre-baked crust (it’s fine if the crust is still warm). Spread it out evenly, then tap the pan firmly on the countertop about 10 times to release any trapped air bubbles. Use the tip of a knife or skewer to pop any visible air bubbles that rise to the surface.
Baking and Cooling Your Cheesecake
Step 1: Create the water bath and bake Pour boiling water into the baking sheet or pan you placed on the bottom rack of your oven, filling it about 1 inch deep. Carefully place your cheesecake on the center rack above the water bath. Bake for 30 minutes at 300°F.
Step 2: Employ the no-crack cooling method After 30 minutes, turn off the oven without opening the door and leave the cheesecake inside for another 15 minutes. The cheesecake is ready when the edges are slightly puffed and set about 1½ inches inward, while the center remains slightly wobbly when gently shaken.
Pro Tip: If you’re unsure about your oven’s reliability, you can check the cheesecake at the 25-minute mark. It should look matte and set around the edges with a wobbly center. If that’s the case, close the door and continue as directed.
Step 3: Start the cooling process Transfer the pan to a wire rack. Immediately run a thin knife or small offset spatula around the edges of the cake to prevent it from sticking to the sides as it cools (which can cause cracks). Allow it to cool completely at room temperature, which typically takes 1-2 hours.
Step 4: Chill thoroughly Once completely cooled, cover loosely with plastic wrap or aluminum foil and refrigerate for at least 4 hours, but preferably overnight. This chilling time is essential for the cheesecake to fully set and develop its flavor.
Serving and Storage Tips
For perfect slices: Dip a sharp knife in hot water and wipe dry between each cut for clean, professional-looking slices.
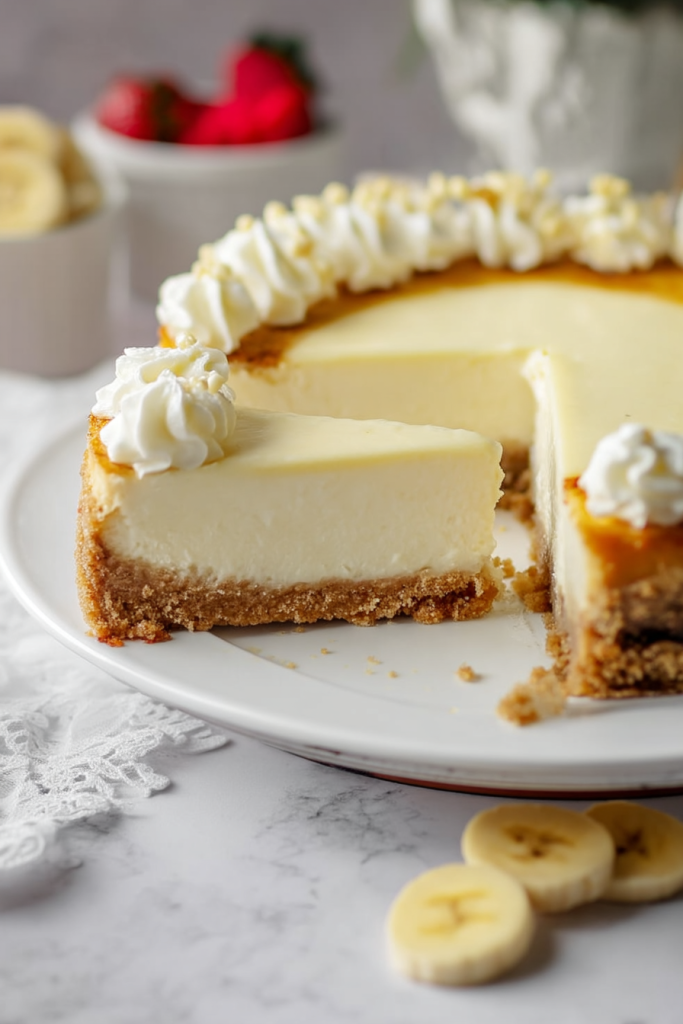
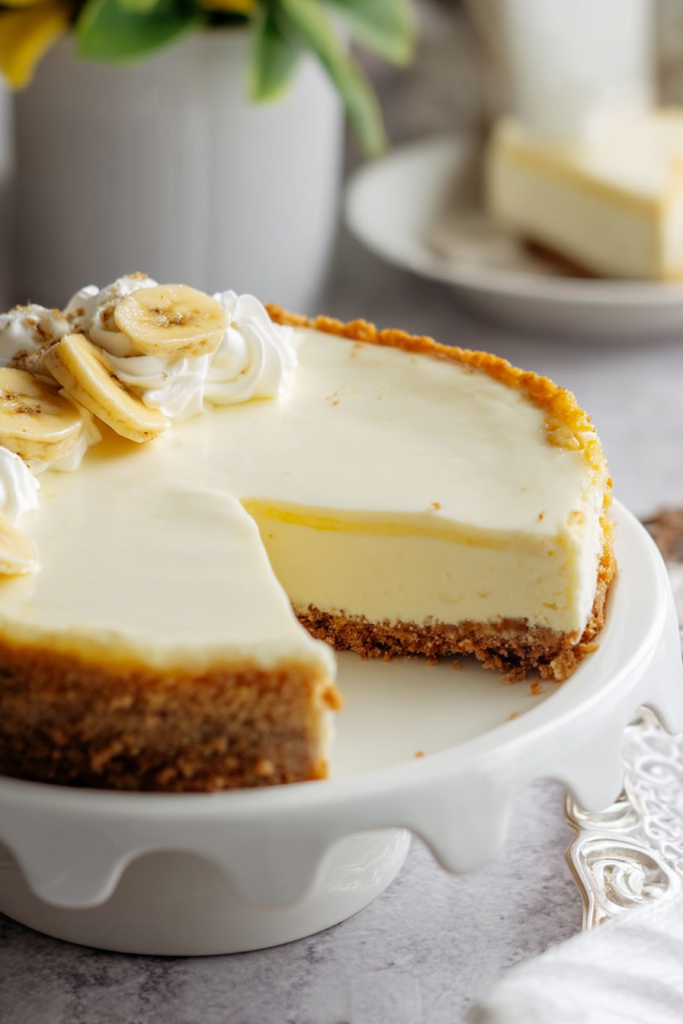
Serving suggestions: This vanilla cheesecake is divine on its own, but you can elevate it with:
- Fresh berries or a berry compote
- Homemade caramel or chocolate sauce
- Lightly sweetened whipped cream
- A dusting of cocoa powder or powdered sugar
- Chocolate shavings or curls
How to store: Keep leftovers in an airtight container or covered with plastic wrap in the refrigerator for up to 5 days.
Freezing instructions: This cheesecake freezes beautifully! Wrap individual slices or the whole cheesecake (without toppings) tightly in plastic wrap, then aluminum foil. Freeze for up to 2 months. Thaw overnight in the refrigerator before serving.
FAQ’s and Troubleshooting
Why did my cheesecake crack? Cracks typically form from drastic temperature changes or overmixing. My gentle cooling method should prevent this, but if cracks still appear, simply top the cheesecake with fruit or whipped cream – it will still taste amazing!
Can I use low-fat cream cheese or sour cream? I don’t recommend it. The full-fat versions create that luxurious, creamy texture that makes this cheesecake special.
Tips for Cheesecake Success & Variations
Room temperature ingredients matter: This isn’t just a suggestion – it’s crucial! Cold cream cheese will remain lumpy no matter how long you beat it. Set your dairy ingredients out at least 1-2 hours before starting.
Don’t rush the process: Each step serves a purpose. Proper mixing, gentle baking, and slow cooling all contribute to cheesecake perfection.
Patience is key: The hardest part might be waiting for it to chill completely. Trust me, it’s worth the wait for that perfect texture and flavor development.
Getting creative: While this classic vanilla cheesecake is magnificent on its own, feel free to experiment with these delicious variations:
- Citrus lover’s version: Add 1 tablespoon of lemon, lime, or orange zest to the filling for a bright twist.
- Chocolate-bottom cheesecake: Sprinkle 1/2 cup mini chocolate chips over the pre-baked crust before adding the filling.
- Espresso infusion: Dissolve 1 tablespoon of espresso powder in the warm water for a subtle coffee undertone.
- Almond extract accent: Replace 1/4 teaspoon of the vanilla extract with almond extract for a sophisticated flavor profile.
- Cookie crust alternatives: Swap graham crackers for chocolate cookies, gingersnaps, or shortbread for a completely different experience.
When I first started making cheesecakes, I was intimidated by their reputation for being finicky. But after developing this foolproof recipe and technique, I’ve found that achieving bakery-quality results at home is absolutely possible! The key is understanding the “why” behind each step.
What I love most about this vanilla cheesecake is its versatility. It’s equally welcome at an elegant dinner party or a casual family gathering. I’ve served it at birthdays, holidays, and sometimes just because it’s Wednesday and we deserve a special treat!
The rich vanilla flavor creates the perfect canvas for seasonal fruits, decadent sauces, or simply enjoying it pure and unadorned. No matter how you choose to serve it, this cheesecake will quickly become your signature dessert that friends and family request time and again.
Remember, the joy of baking isn’t just in the eating (though that’s certainly a wonderful part!) – it’s in creating something special with your own hands that brings happiness to those you share it with. I hope this vanilla cheesecake recipe becomes a beloved part of your baking repertoire for years to come!
Have you tried making cheesecake before? What’s your favorite topping? I’d love to hear about your experiences in the comments below!