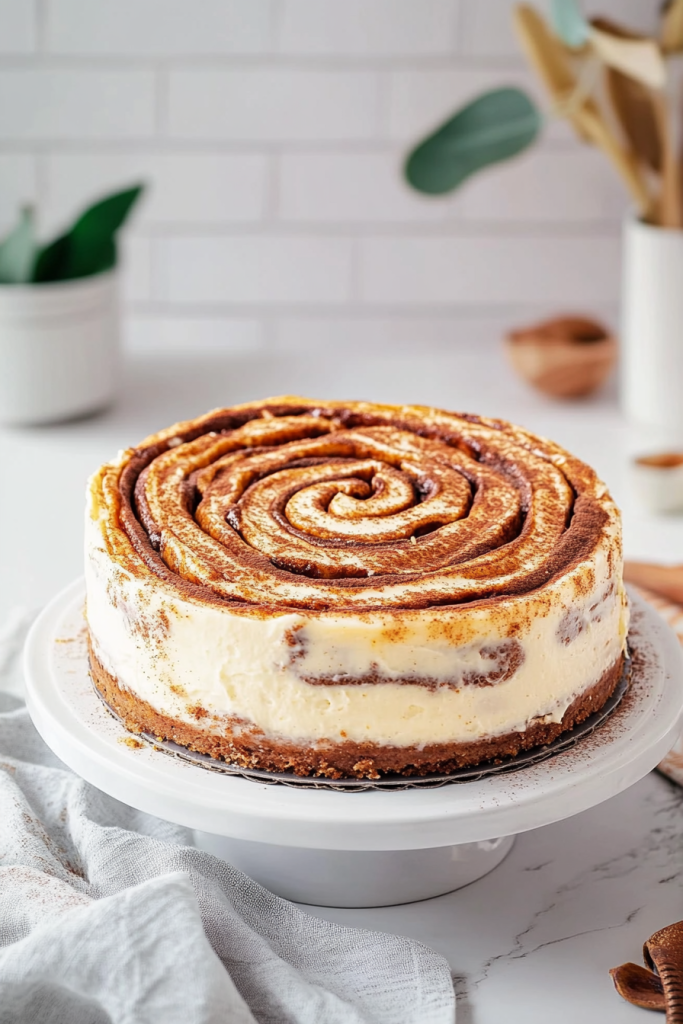
The ultimate indulgence for maple lovers everywhere – Maple Cheesecake with Brown Butter Graham Cracker Crust! This isn’t just any ordinary cheesecake. Two luxurious layers of velvety smooth cream cheese infused with pure maple syrup and nutty brown butter, nestled on a buttery graham cracker crust with hints of cinnamon. Every bite is perfectly balanced, rich with maple flavor, and truly a melt-in-your-mouth experience! It’s the perfect dessert to impress guests during fall gatherings, holiday celebrations, or whenever you’re craving something utterly decadent. Bonus? Though it looks impressive, this recipe breaks down into simple steps anyone can master!
About The Recipe
When the crisp fall air arrives, my mind always drifts to the comforting flavor of maple. There’s something magical about that rich, amber sweetness that feels like a warm hug on a cool day. After years of experimenting with maple-infused desserts, I knew I needed to create the ultimate maple cheesecake that would showcase this incredible flavor in its most luxurious form.
This cheesecake is no ordinary maple-flavored dessert, though. This is maple elevated to an art form, where every element has been carefully crafted to enhance that distinctive flavor we all love.
When developing this recipe, I wanted to create something that would make maple the star while still maintaining that perfect cheesecake texture – creamy, smooth, with just the right density. The brown butter addition wasn’t part of my original vision, but after accidentally browning butter for another recipe, I realized the nutty, caramel notes would perfectly complement the maple.
After countless tests, adjusting sweetness levels, experimenting with different maple syrups (yes, they do vary tremendously in flavor!), and perfecting that brown butter graham cracker crust, I finally arrived at what I believe to be the ultimate maple cheesecake experience.
The best part? Despite its sophisticated flavor profile, this cheesecake is surprisingly approachable to make!
Every forkful delivers a perfect balance of sweet maple, tangy cream cheese, and nutty brown butter with a hint of cinnamon from the crust. One bite and you’ll understand why this has become my most requested dessert for family gatherings!
Reasons You Will Love This Maple Cheesecake
- A sophisticated flavor profile that feels gourmet but uses simple ingredients
- The brown butter element adds incredible depth to both crust and filling
- Pure maple syrup provides natural sweetness without being cloying
- The surprise graham cracker layer in the middle adds delightful texture contrast
- Topped with maple-infused whipped cream for the ultimate finish
- The perfect showstopping dessert for fall gatherings, Thanksgiving, or whenever you want to impress!
Equipment Needed
- 9-inch Springform Pan
- Parchment Paper
- Large Mixing Bowls
- Hand or Stand Mixer
- Measuring Cups and Spoons
- Saucepan (for browning butter)
- Spatula
- Large Roasting Pan (for water bath)
- Cooling Rack
- Offset Spatula
Ingredients
For The Brown Butter Graham Cracker Crust:
- 14 tablespoons (196g) unsalted butter
- 3 cups (420g) graham cracker crumbs (about 3 sleeves)
- ¾ cup (150g) granulated sugar
- ½ teaspoon ground cinnamon
- Pinch of salt
Description:
- Unsalted Butter – We’re browning this butter to add a nutty, caramel-like depth to the crust that perfectly complements the maple flavor. It’s truly a game-changer!
- Graham Cracker Crumbs – The foundation of our crust. You can use store-bought crumbs or make your own by pulsing whole graham crackers in a food processor. Either regular or gluten-free works perfectly!
- Granulated Sugar – Adds just enough sweetness to the crust while helping it hold together.
- Ground Cinnamon – This warm spice enhances the nutty brown butter and creates a perfect backdrop for our maple cheesecake.
- Salt – Just a pinch balances the sweetness and brings out all the other flavors.
For The Maple Brown Butter Cheesecake:
- 6 tablespoons unsalted butter
- 4 blocks (32 oz) full-fat cream cheese, room temperature
- ½ cup (100g) dark brown sugar, packed
- 2 tablespoons cornstarch
- 1 cup (325g) pure maple syrup*
- 3 large eggs plus 1 egg yolk, room temperature
- 1 tablespoon vanilla extract
- 1 cup (240g) sour cream, room temperature
Description:
- Unsalted Butter – We’ll brown this butter just like for the crust, adding that nutty dimension to the filling as well.
- Cream Cheese – The foundation of any good cheesecake! I recommend using full-fat Philadelphia brand for the creamiest texture. Room temperature is absolutely crucial for a smooth batter.
- Dark Brown Sugar – With its higher molasses content, dark brown sugar adds depth that perfectly complements the maple flavor.
- Cornstarch – This helps stabilize our cheesecake and prevent cracks.
- Pure Maple Syrup – The star of the show! Be sure to use only 100% pure maple syrup (not pancake syrup) for the best flavor. I prefer Grade A Dark Amber or Grade B for their robust flavor.
- Eggs – Provides structure while maintaining that creamy texture we all love. The extra yolk adds richness.
- Vanilla Extract – Enhances the maple flavor without competing with it.
- Sour Cream – Adds tanginess to balance the sweetness and creates that velvety texture.
For The Toppings:
- 2 cups (480ml) heavy whipping cream
- 1 tablespoon powdered sugar
- Extra graham cracker crust mixture (reserved from earlier)
- Pure maple syrup, for drizzling
Description:
- Heavy Whipping Cream – Whips up into a cloud-like topping that’s the perfect finishing touch.
- Powdered Sugar – Just enough to lightly sweeten the whipped cream.
- Extra Graham Cracker Crust – We’ll reserve some of our delicious brown butter crust mixture for sprinkling on top.
- Pure Maple Syrup – A final drizzle ties everything together and reinforces the maple flavor.
*IMPORTANT NOTE ABOUT MAPLE SYRUP: Make sure to use pure maple syrup, where the only ingredient listed is maple syrup. Don’t use pancake syrup as this is mainly corn syrup with artificial flavors. For the best flavor and consistency, use the real stuff. It makes all the difference in this recipe!
How To Make A Perfect Maple Cheesecake
Instructions for Brown Butter Graham Cracker Crust
- Preheat oven to 350°F (175°C).
- Lightly spray the entire inside of a 9-inch springform pan with nonstick spray and line the bottom with parchment paper.
- In a medium saucepan, melt 14 tablespoons of butter over medium heat.
- Continue cooking, stirring constantly, until the butter goes from loud and bubbly to quiet and frothy.
- Watch carefully as it turns golden amber and gives off a nutty aroma (about 5-7 minutes total).
- Pour browned butter into a wide, shallow dish to cool, making sure to scrape in all the flavorful brown bits.
- In a large bowl, combine graham cracker crumbs, sugar, cinnamon, and salt.
- Pour in cooled brown butter and stir until the mixture resembles wet sand.
- Reserve ⅓ of this mixture in a separate bowl and set aside (we’ll use this later).
- Press the remaining ⅔ of the mixture into the bottom and about 1½ inches up the sides of the prepared springform pan.
- Use a flat-bottomed measuring cup to firmly pack the crust.
- Bake for 8 minutes until just set and slightly fragrant.
- Remove from oven and allow to cool while preparing the filling.
Step 1: Brown the butter In a medium saucepan, melt the butter over medium heat. Continue cooking and stirring until the butter stops bubbling, becomes foamy, and then turns a beautiful amber color with a nutty aroma. This should take about 5-7 minutes total. Watch it closely at the end as it can burn quickly! Pour into a shallow dish to cool, making sure to scrape in all those flavorful brown bits from the bottom of the pan.
Step 2: Prepare the crust mixture In a large bowl, combine the graham cracker crumbs, sugar, cinnamon, and salt. Pour in the cooled brown butter and stir until the mixture resembles wet sand and holds together when pressed between your fingers. The brown butter adds an incredible nutty depth that perfectly complements the maple flavors we’ll be adding to the cheesecake.
Step 3: Reserve and press the crust Set aside about ⅓ of the crust mixture in a separate bowl (we’ll use this for a surprise middle layer and topping). Press the remaining ⅔ of the mixture firmly into the bottom and about 1½ inches up the sides of your prepared springform pan. I find a flat-bottomed measuring cup works perfectly for creating an even, well-packed crust. Bake just until set, about 8 minutes, then cool while you make the filling.
Instructions for Maple Brown Butter Cheesecake
- Reduce oven temperature to 325°F (165°C).
- Position one oven rack at the bottom of the oven and another in the center.
- Place a large roasting pan on the bottom rack.
- Brown the remaining 6 tablespoons of butter following the same process as before.
- Pour into a measuring cup and refrigerate while preparing the filling.
- In a large mixing bowl, beat the softened cream cheese, brown sugar, and cornstarch on low speed until completely smooth (about 2-3 minutes).
- Scrape down the bowl several times during mixing to ensure no lumps remain.
- With the mixer on low, gradually pour in the maple syrup, stopping halfway to scrape down the bowl.
- Fill a large pot with 6-7 cups of water and bring to a boil (for the water bath).
- Remove the browned butter from the refrigerator – the brown bits will have settled at the bottom.
- Carefully pour the golden butter into another container, leaving behind the brown bits.
- Add only the brown bits to the cheesecake batter and mix to combine.
- Add vanilla extract and mix until incorporated.
- With mixer on low, add eggs one at a time, allowing each to fully incorporate before adding the next.
- Mix in the sour cream until just combined.
- Give the batter a final mix by hand to ensure it’s smooth and all ingredients are fully incorporated.
- Pour half the cheesecake batter into the cooled crust.
- Sprinkle most of the reserved crust mixture over the batter, keeping about 3 tablespoons for the topping.
- Gently pour the remaining batter over the graham cracker layer, being careful not to disturb it.
- Place the cheesecake on the center rack of the oven, with the roasting pan containing boiling water on the rack below.
- Bake for 1 hour and 30 minutes, until the edges are set and golden but the center still has a slight jiggle.
- Turn off the oven, crack the door open, and let the cheesecake cool in the oven for 45 minutes.
- Remove from oven and cool at room temperature for another 30 minutes.
- Refrigerate uncovered overnight, or at least 8 hours.
Step 1: Prepare for baking Reduce the oven temperature to 325°F and set up your racks – one at the bottom for the water bath and one in the center for the cheesecake. This water bath method is crucial for achieving that perfectly creamy texture without cracks.
Step 2: Brown the butter for the filling Just like we did for the crust, brown the remaining 6 tablespoons of butter until it’s fragrant and amber-colored. This time, refrigerate it so the brown bits (where all the flavor is) settle to the bottom.
Step 3: Make the cheesecake batter The key to a smooth cheesecake is starting with room temperature ingredients and mixing on low speed. Beat the cream cheese, brown sugar, and cornstarch until completely smooth, then gradually add the maple syrup. The brown bits from your browned butter go in next, followed by vanilla, eggs (one at a time), and finally sour cream. A gentle touch here prevents incorporating too much air, which can cause cracks later.
Step 4: Create the middle layer surprise This is my favorite part! Pour half the batter into your crust, then sprinkle most of the reserved crust mixture over it. This creates a delightful textural surprise in the middle of the cheesecake. Then carefully pour the remaining batter over top.
Step 5: Bake with the water bath and cooling method The water bath creates a gentle, humid environment for your cheesecake to bake evenly. After baking, the gradual cooling process (first in the cracked oven, then at room temperature, and finally overnight in the refrigerator) prevents temperature shock which can cause cracks and ensures the perfect texture.
Instructions for Topping and Serving
- Remove the springform ring and transfer the chilled cheesecake to a serving plate.
- In a large bowl, whip the heavy cream until soft peaks begin to form.
- Add the powdered sugar and continue whipping until medium peaks form.
- Pile the whipped cream on top of the cheesecake.
- Sprinkle with the remaining graham cracker crust mixture.
- Drizzle with additional maple syrup just before serving.
Step 1: Prepare the whipped cream After your cheesecake has chilled completely (patience is key!), whip the heavy cream until soft peaks begin to form. Add just a touch of powdered sugar and continue whipping until you reach medium peaks. This lightly sweetened whipped cream is the perfect complement to our rich cheesecake.
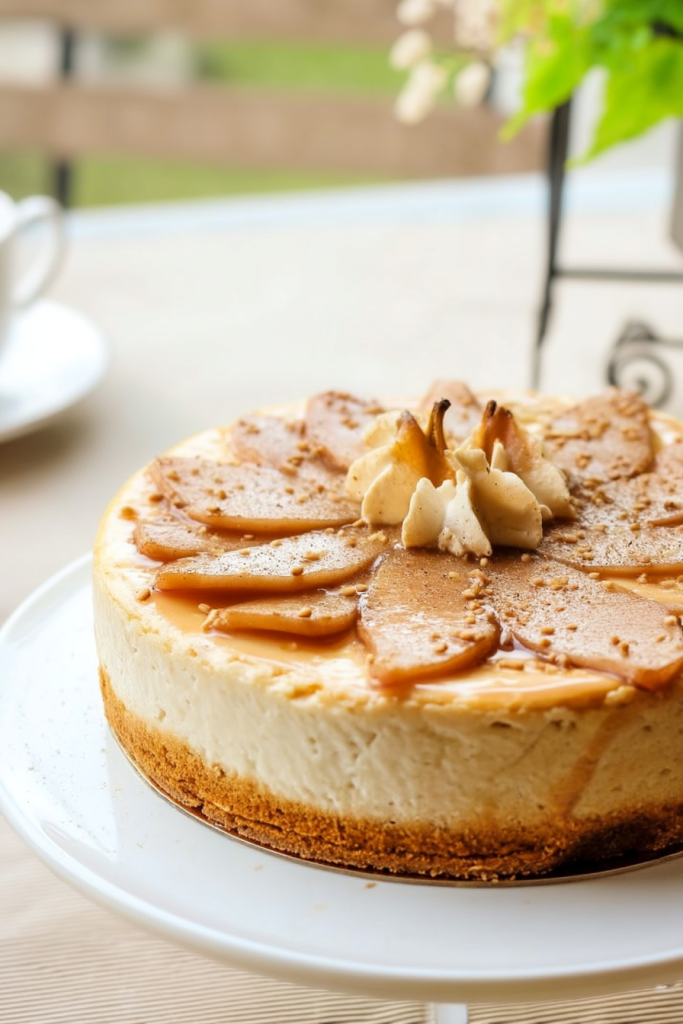
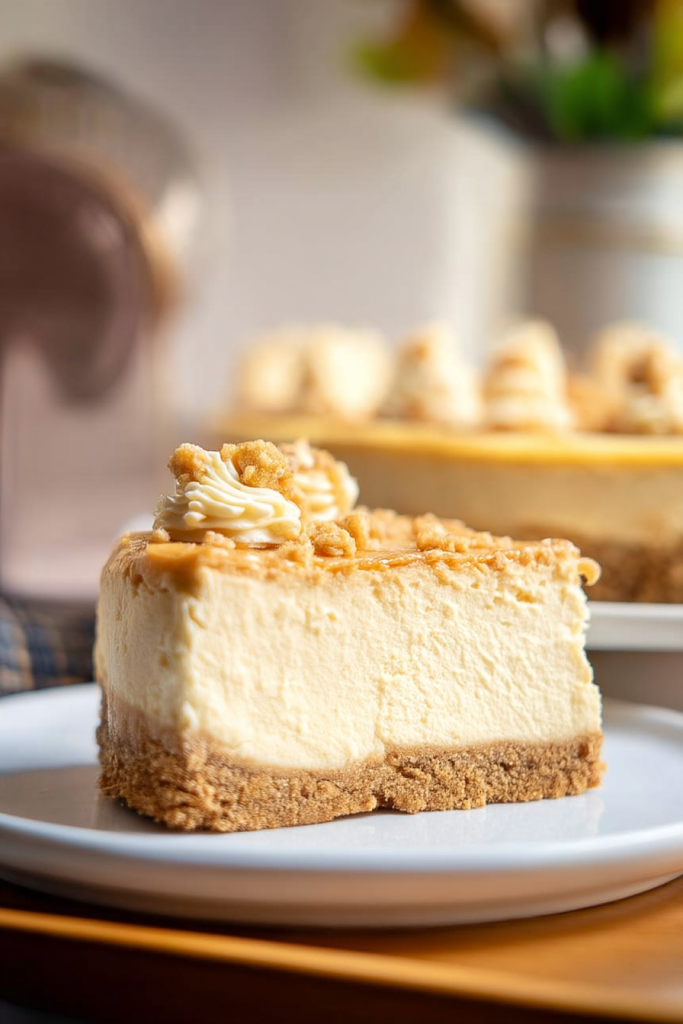
Step 2: Assemble and serve Remove the springform ring and transfer to your favorite serving plate. Top with the freshly whipped cream, a sprinkle of the reserved graham cracker crumbs, and a generous drizzle of pure maple syrup. The presentation is absolutely stunning and hints at the maple goodness inside!
FAQ’s and Troubleshooting
Can I use low-fat cream cheese? I don’t recommend it for this recipe. Full-fat cream cheese provides that luxurious, silky texture that makes this cheesecake special. Low-fat versions contain more moisture and stabilizers that can affect both texture and baking time.
My cheesecake cracked! What happened? Cracks usually happen for one of three reasons: overmixing (incorporating too much air), overbaking, or temperature shock. Make sure to mix on low speed, use a water bath, and follow the gradual cooling instructions. But remember, even a cracked cheesecake is still delicious – that’s what the whipped cream topping is for!
Can I use artificial maple flavor instead of real maple syrup? Please don’t! This cheesecake is all about that pure maple flavor, and artificial flavoring just won’t give you the same depth and complexity. Pure maple syrup is worth the splurge for this special dessert.
What’s the difference between Grade A and Grade B maple syrup? Grade A maple syrup (which now comes in Light, Medium, or Dark Amber) is made earlier in the season and has a milder flavor. Grade B (now called Grade A Dark/Very Dark) is made later in the season and has a stronger, more robust maple flavor. Either works in this recipe, but I prefer the darker varieties for their stronger flavor.
Can I make this cheesecake ahead of time? Absolutely! In fact, it’s best made at least a day ahead. The cheesecake will keep in the refrigerator for up to 5 days. Add the whipped cream topping just before serving for the best presentation.
My brown butter solidified before I could mix it with the graham crackers. What should I do? Simply rewarm it gently until it’s pourable again. The important thing is that you’ve already developed those delicious browned milk solids, which is where all the flavor is.
Can I freeze this cheesecake? Yes! Wrap it well without the toppings and freeze for up to 2 months. Thaw overnight in the refrigerator and add fresh toppings before serving.
How to Achieve The Perfect Brown Butter
Browning butter is simple, but it does require your attention. Here are my top tips:
- Use a light-colored pan if possible, so you can easily see the color changing.
- Cut the butter into even pieces for more even melting.
- Stir constantly once the butter starts to foam to prevent burning.
- You’ll know it’s ready when it stops bubbling, turns amber in color, and smells nutty and fragrant.
- Have your bowl ready for transferring – once brown butter is done, it can burn quickly!
- Don’t discard those brown bits – that’s where all the flavor is!
Decorating Ideas
With a maple cheesecake this special, you might want to vary the presentation. Here are some of my favorite ways to serve it:
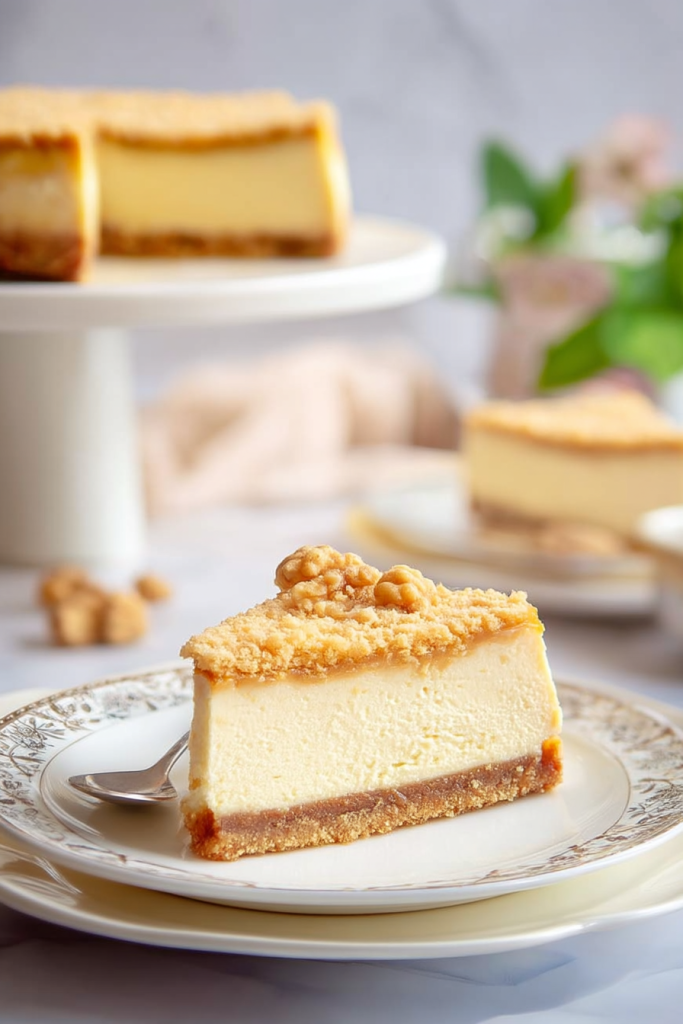
- Top with maple-candied pecans or walnuts for a delightful crunch.
- Add a sprinkle of flaky sea salt to the top for a sweet-salty contrast.
- Drizzle with a bourbon caramel sauce for an adult twist.
- During apple season, top with sautéed cinnamon apples.
- For a festive holiday touch, add a sprinkle of cinnamon or pumpkin pie spice to the whipped cream.
- Serve with fresh berries on the side – the tartness pairs beautifully with the sweet maple.
- For individual servings, cut slices and place on plates with a maple leaf stencil and dust with powdered sugar.
How To Store
This cheesecake actually improves with a day or two in the refrigerator as the flavors meld and deepen. Here’s how to store it properly:
- Refrigerate: Cover loosely with plastic wrap or store in a cake container in the refrigerator for up to 5 days.
- Freeze: For longer storage, wrap individual slices or the whole cheesecake (without toppings) tightly in plastic wrap, then in aluminum foil. Freeze for up to 2 months. Thaw overnight in the refrigerator.
- For best flavor, allow refrigerated cheesecake to sit at room temperature for about 30 minutes before serving.
- Add the whipped cream, graham cracker sprinkle, and maple drizzle just before serving for the freshest presentation.
What Makes This Maple Cheesecake Special
When I first set out to create the ultimate maple cheesecake, I wanted something that would truly showcase the complex flavors of pure maple syrup. What makes this recipe stand out from others is the double dose of brown butter – both in the crust and in the filling. This technique adds a nutty, almost caramelized dimension that enhances the maple flavor in ways I never expected.
The surprise layer of graham cracker crust in the middle is another feature that makes this cheesecake unique. It provides a delightful textural contrast and ensures that every bite has the perfect balance of creamy cheesecake and buttery crust.
I’ve also carefully calibrated the sweetness. By using dark brown sugar alongside the maple syrup, we get a depth of flavor that isn’t just sweet – it’s complex, rich, and utterly satisfying. The tanginess of the cream cheese and sour cream balances everything perfectly.
The water bath method might seem fussy, but I promise it’s worth it. It ensures your cheesecake bakes gently and evenly, preventing cracks and creating that silky-smooth texture that melts in your mouth.
Perfect Occasions for Maple Cheesecake
This isn’t an everyday dessert – it’s special. Here are some occasions where this maple cheesecake truly shines:
- Fall gatherings – The warm, comforting maple flavor is perfect for autumn.
- Thanksgiving – A sophisticated alternative to pumpkin pie that still feels seasonal.
- Holiday celebrations – Elegant enough for Christmas or New Year’s dessert tables.
- Dinner parties – Impressive enough to wow your guests but can be made a day ahead.
- Maple season celebrations – If you’re lucky enough to live in maple country, this is the perfect way to honor the harvest.
Final Tips for Success
After making this cheesecake countless times, I’ve gathered a few final tips that make all the difference:
- Temperature matters: Room temperature ingredients aren’t just a suggestion – they’re essential for a smooth batter.
- Don’t rush: Each step – from properly browning the butter to the overnight chilling – contributes to the final result.
- Quality ingredients: With a recipe this simple, the quality of your ingredients really shines through. Use the best cream cheese and maple syrup you can find.
- Mix gently: Overmixing incorporates air, which can lead to cracks and a less creamy texture.
- Trust your senses: Your nose will tell you when the butter is perfectly browned, and your eyes will tell you when the cheesecake is perfectly baked (set around edges, slight jiggle in center).
The first time I served this maple cheesecake to my family, there was a moment of silence as everyone took their first bite, followed by a chorus of “Wow!” That’s when I knew I had created something truly special. Now it’s a tradition in our home during the fall and winter months, and I hope it becomes one in yours too.
I’d love to hear how this recipe turns out for you! The magic happens when that creamy, maple-infused filling meets the nutty, brown butter crust. It’s a little bit of maple heaven on a plate.
Happy baking!
More Maple-Inspired Recipes You Might Love
If you enjoy this maple cheesecake, you might also love these maple-forward desserts from my collection:
- Maple Pecan Cookies with Brown Butter Glaze
- Maple Crème Brûlée with Candied Walnuts
- Maple Apple Upside-Down Cake
- Maple Bourbon Bread Pudding
- Maple Mascarpone Tart with Fresh Berries
Each recipe celebrates the natural sweetness and complex flavor of pure maple syrup in unique and delicious ways. Like this cheesecake, they’re perfect for highlighting one of nature’s most delicious natural sweeteners.