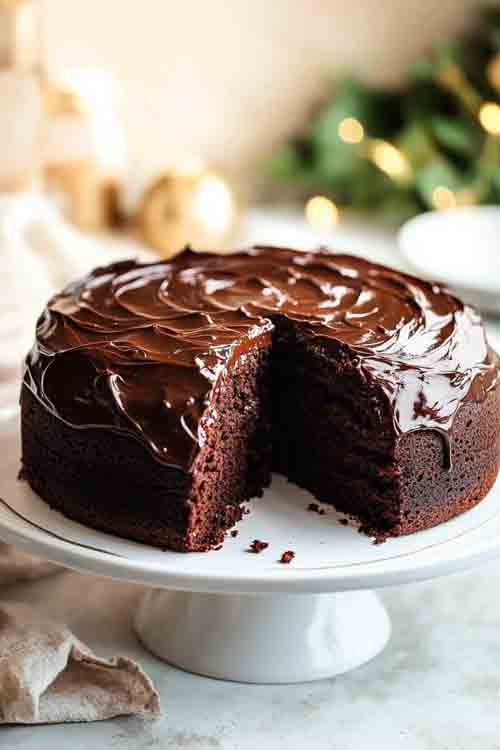
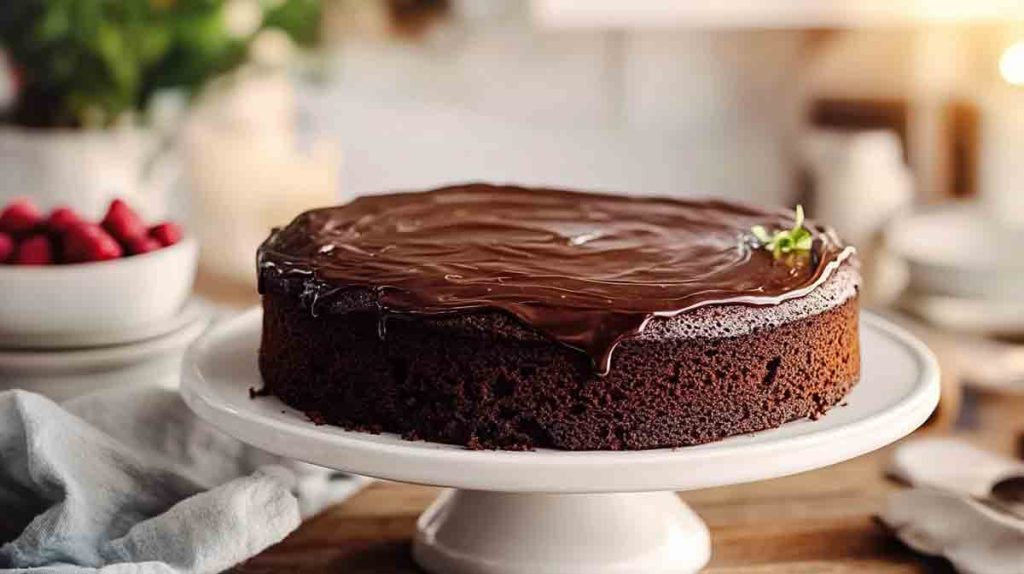
The ultimate dessert for chocoholics! This Matilda Style Chocolate Cake is inspired by the iconic scene from the beloved movie, and it’s everything you’ve dreamed of and more. Rich, moist chocolate layers are paired with an indulgent chocolate fudge frosting to create a cake so delicious, it feels magical. Whether it’s for a special occasion or just a treat-yourself moment, this cake is bound to steal the show!
About the Recipe
When I think about the perfect chocolate cake, the Matilda style comes to mind instantly—moist, fudgy, and sinfully rich. It’s not just a cake; it’s an experience that feels nostalgic and luxurious at the same time.
I’ve experimented with countless chocolate cake recipes to achieve this masterpiece, and let me tell you, this one hits the mark. The layers are intensely chocolaty, thanks to the combination of cocoa powder, coffee, and dark chocolate. And that frosting? Oh, it’s pure decadence—a velvety smooth chocolate fudge frosting that elevates this cake to legendary status.
Every bite is a journey into chocolate heaven. It’s not just a dessert; it’s an event to savor with friends, family, or maybe just by yourself (because why not?).

Reasons You’ll Love This Cake
- Super moist and tender cake layers.
- Made with rich cocoa and a hint of coffee for depth of flavor.
- Topped with an irresistible chocolate fudge frosting.
- A show-stopper for birthdays, celebrations, or any time you crave chocolate.
- Easier to make than it looks!
Equipment Needed
- Mixing Bowls
- Whisk
- Electric or Stand Mixer
- 3 8-Inch Cake Pans
- Cooling Rack
- Offset Spatula
Ingredients for Matilda Style Chocolate Cake
For the Cake
- 2 cups all-purpose flour – Provides the structure for the cake. Make sure to sift for a smooth batter.
- 1.5 tsp baking powder – Helps the cake rise beautifully.
- 1.5 tsp baking soda – Balances acidity and gives an extra lift.
- 1 cup granulated sugar – Adds the perfect sweetness.
- ⅔ cup light brown sugar – Enhances the flavor with a hint of molasses.
- 1 tsp salt – Balances the sweetness and enhances chocolate flavor.
- 3 large eggs (room temperature) – Essential for structure and richness.
- ⅔ cup vegetable oil – Keeps the cake ultra-moist.
- ⅓ cup buttermilk – You can make your own by mixing ⅓ cup whole milk with 1 tsp vinegar.
- 1 cup sour cream – Adds moisture and a slight tang.
- ¾ cup cocoa powder (Dutch-processed preferred) – The star ingredient for that rich chocolatey flavor.
- 2 tsp instant coffee – Enhances the depth of chocolate flavor.
- ¾ cup boiling water – Bloom the cocoa powder for intense flavor.
For the Chocolate Fudge Frosting
- 300g dark chocolate – Melted and used as the base for this rich frosting.
- 3 tbsp corn syrup – Adds a glossy, silky finish.
- 8 oz cream cheese (room temperature) – Provides a creamy and tangy element.
- ⅓ cup cocoa powder – Amplifies the chocolate flavor.
- 1 cup powdered sugar – For a touch of sweetness.
- ¼ tsp salt – Balances all the flavors perfectly.
- 1 ¼ cup heavy cream (chilled) – Whipped to create a light, airy frosting.
Ingredient Notes
- Cocoa Powder: Using Dutch-processed cocoa is a game-changer. It’s smoother and richer than natural cocoa.
- Instant Coffee: Even if you’re not a coffee fan, trust me, you won’t taste it. It just makes the chocolate flavor pop!
- Dark Chocolate: Opt for at least 70% cocoa for the best results
How to Make Matilda Style Chocolate Cake
Step 1: Prepare the Cake Batter
- Preheat the oven to 350°F (175°C) and prepare three 8-inch cake pans by greasing them and lining the bottoms with parchment paper.
- In a large bowl, whisk together the flour, baking powder, baking soda, granulated sugar, light brown sugar, and salt until fully combined. This ensures no lumps remain in your dry ingredients.
- In a separate bowl, whisk together the eggs, vegetable oil, buttermilk, and sour cream until smooth. These wet ingredients create the rich, moist texture that makes this cake so special.
- Gradually add the dry ingredients to the wet ingredients in two additions, gently folding and whisking until just combined. Avoid overmixing, as this can lead to a dense cake.
Step 2: Bloom the Cocoa
- In a small bowl, whisk the cocoa powder and instant coffee together. Pour the boiling water over the mixture and whisk until a smooth, shiny chocolate paste forms.
- Add this chocolate mixture to the prepared batter, folding gently until fully incorporated. The batter will now have a deep, chocolaty hue.
Step 3: Bake the Cake
- Divide the batter evenly among the three prepared cake pans. Use a spatula to level the tops for even baking.
- Bake for 22-24 minutes, or until a toothpick inserted into the center comes out with moist crumbs attached.
- Allow the cakes to cool in their pans for about 20 minutes. Then carefully transfer them to a wire rack to cool completely. For the best results, refrigerate the cooled cakes for an hour before frosting.
How to Make the Chocolate Fudge Frosting
Step 1: Melt the Chocolate
- Place the dark chocolate and corn syrup in a small saucepan over the lowest heat. Stir constantly until the chocolate has completely melted and the mixture is smooth. Set aside to cool slightly.
- Be sure to keep the temperature low while melting the chocolate to avoid burning it. The corn syrup adds a glossy finish to the frosting.
Step 2: Prepare the Frosting Base
- In the bowl of a stand mixer, add the cream cheese and sift in the cocoa powder, powdered sugar, and salt. Using the paddle attachment, mix on medium speed for 1-2 minutes until the mixture becomes smooth and creamy.
- Scrape the bowl down to ensure everything is well incorporated.
Step 3: Whip the Frosting
- With the mixer on low speed, slowly add the chilled heavy cream. Once it’s incorporated, increase the speed to medium-high and whip the frosting until light and fluffy. This step gives the frosting its airy texture.
- Add the melted chocolate to the frosting mixture slowly, ensuring it’s well-mixed. The frosting will become slightly runny at this point, but don’t worry—this is perfectly normal.
Step 4: Cool the Frosting
- Allow the frosting to cool at room temperature for about 30 minutes or until it thickens and becomes spreadable. If the frosting becomes too firm, simply remove a cup of frosting, microwave it for a few seconds to warm it up, and whisk it back in.
Assembling the Cake
- Once the cakes and frosting have cooled down, it’s time to assemble! Carefully use a serrated knife to level off the tops of the cakes.
- Place one cake layer on a cake plate or stand and spread a generous amount of frosting on top.
- Add the second layer and repeat the frosting process.
- Add the final layer of cake and cover the entire cake with a thin layer of frosting (this is your crumb coat). Refrigerate the cake for 20 minutes to allow the crumb coat to set.
- Once chilled, apply the remaining frosting and smooth it out using an offset spatula for a polished finish.
FAQs
1. Can I substitute Dutch-processed cocoa powder with natural cocoa powder?
Yes, you can, but keep in mind that Dutch-processed cocoa has a smoother, less acidic flavor, which enhances the richness of the cake. If using natural cocoa, the flavor may be slightly tangier, and you may need to adjust the leavening agents.
2. Why is my cake too dense?
A dense cake could be due to overmixing the batter or not properly measuring your ingredients. Ensure you gently fold the batter until just combined and avoid compacting the flour while measuring.
3. Can I make this cake in advance?
Absolutely! You can bake the cake layers up to 2 days in advance. Wrap them tightly in plastic wrap and store at room temperature or in the fridge. The frosting can also be made a day ahead and kept chilled. Bring it to room temperature and whip again before using.
4. Can I make this recipe dairy-free?
You can try swapping the dairy ingredients with plant-based alternatives, like coconut cream for heavy cream, vegan cream cheese, and almond milk for buttermilk. The texture might vary slightly, but it should still be delicious!
5. Can this recipe be made as cupcakes?
Yes! Line a muffin pan with cupcake liners and fill each about ¾ full with batter. Bake at the same temperature for about 18-20 minutes, or until a toothpick comes out clean.
Storage Tips Matilda Style Chocolate Cake
Room Temperature:
Once frosted, the cake can be stored at room temperature in an airtight container or covered with a cake dome for up to 2 days.
Refrigerator:
To keep it fresh longer, refrigerate the cake in an airtight container. It will stay moist and delicious for up to 5 days. Let the cake come to room temperature before serving for the best flavor.
Freezer:
Wrap individual slices or the whole cake tightly in plastic wrap and then in aluminum foil to prevent freezer burn. Store in the freezer for up to 3 months. Thaw in the refrigerator overnight and bring to room temperature before enjoying.
Final Touches and Decorating Ideas
This cake is a blank canvas for creativity! Here are some fun ideas:
- Drizzle melted chocolate or ganache over the top for a glossy finish.
- Garnish with chocolate shavings, sprinkles, or fresh berries.
- Add a dusting of powdered sugar or cocoa powder for a simple yet elegant touch.
- For a fun twist, pipe rosettes or patterns with any leftover frosting.
This Matilda Style Chocolate Cake is sure to be the star of any gathering. Whether you’re celebrating a birthday, holiday, or just indulging in a chocolate craving, it’s a recipe you’ll return to time and time again.


