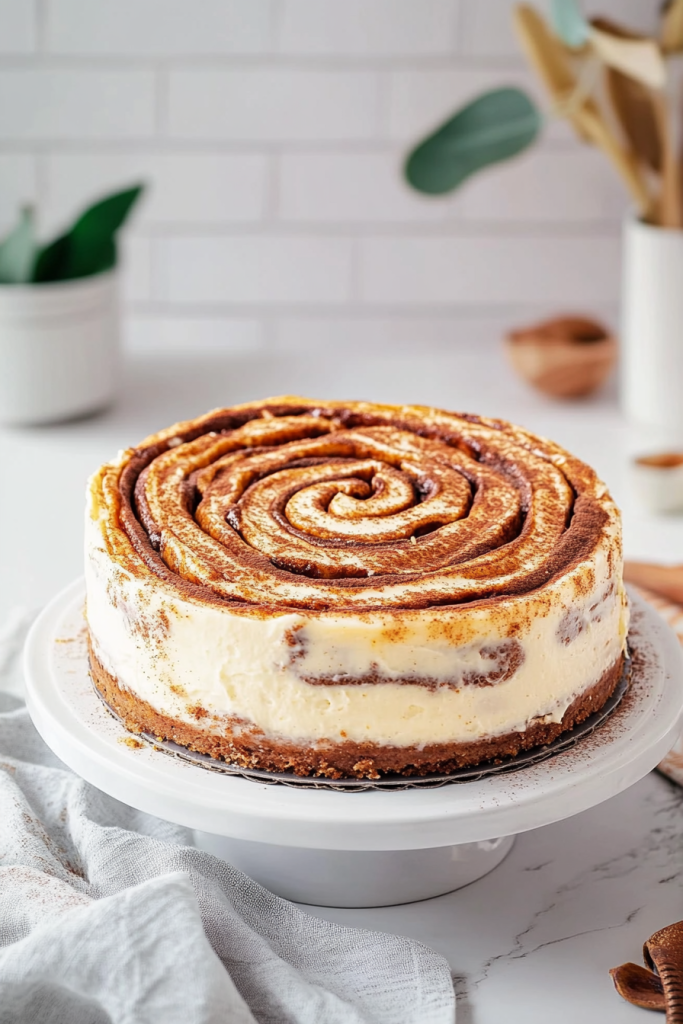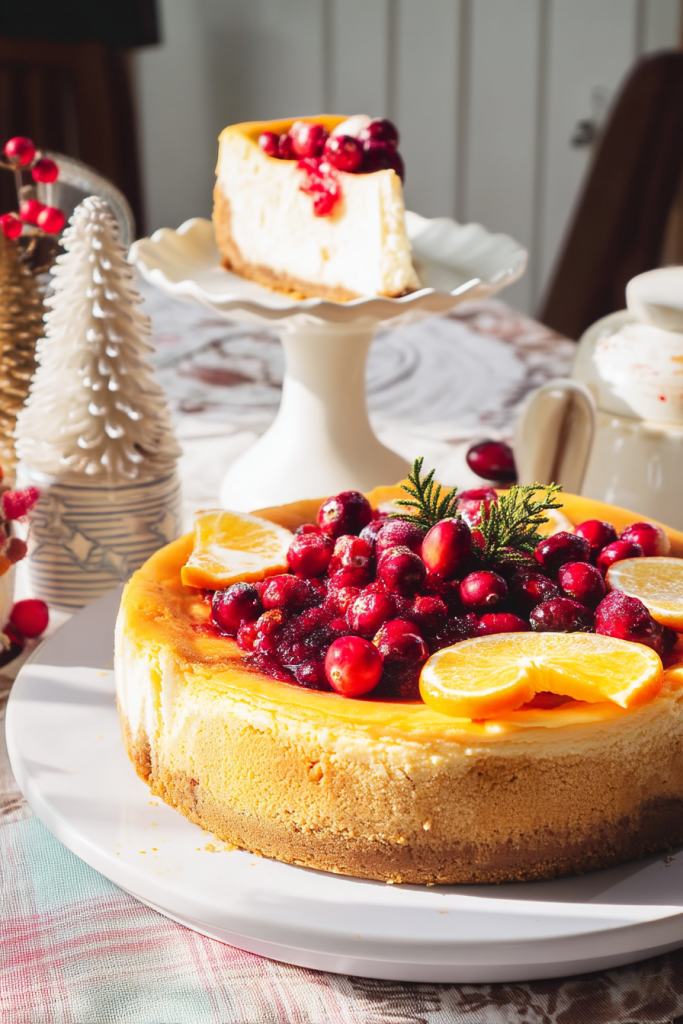
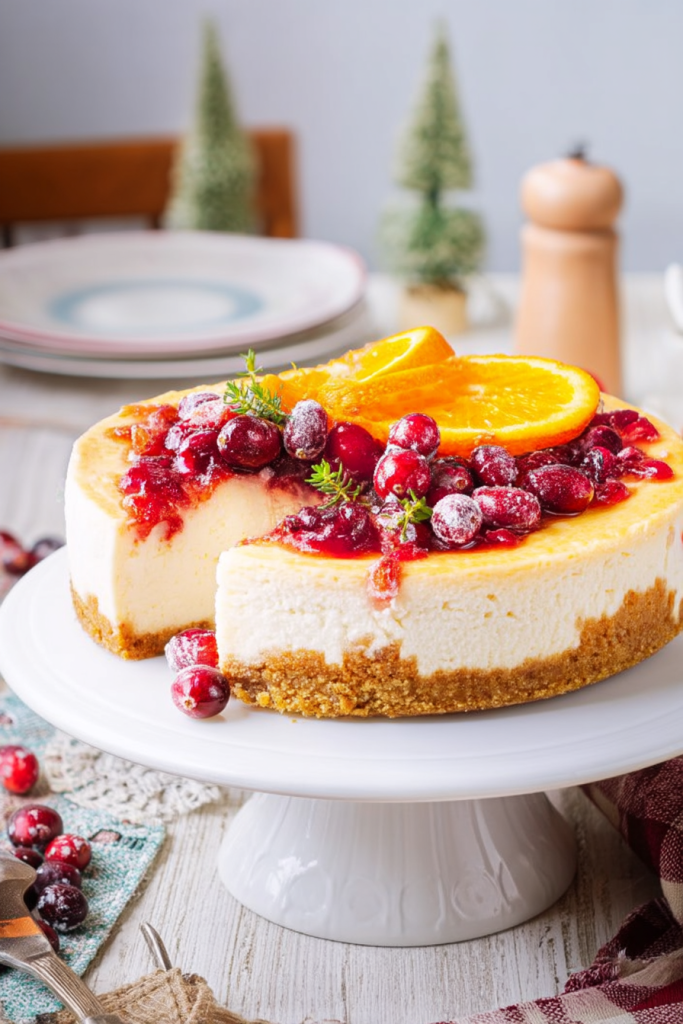
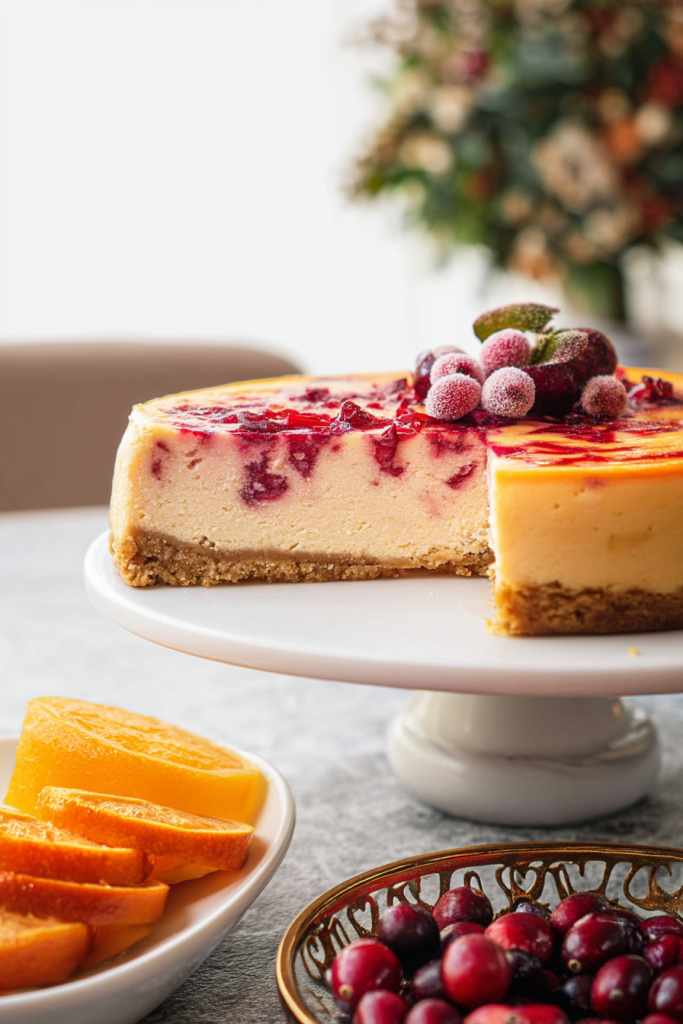
The perfect holiday dessert that combines tangy cranberries with bright citrus flavors in a Orange Cranberry Cheesecake! This stunning dessert features a warmly spiced graham cracker crust, a silky-smooth cream cheese filling infused with fresh orange zest, and topped with a vibrant homemade cranberry sauce. Every bite offers the perfect balance of creamy, tangy, and sweet flavors that dance on your palate! It’s the ideal showstopper for Thanksgiving, Christmas, or any special winter gathering. And while it looks professionally made, I’ve broken down all the steps to make this impressive dessert accessible for bakers of all skill levels!
About The Recipe
When the holiday season rolls around, I’m always looking for that perfect dessert that feels festive but isn’t the same old pumpkin or apple pie everyone expects. That’s exactly why I created this Orange Cranberry Cheesecake! The combination of tart cranberries and bright orange is a match made in culinary heaven, especially when paired with the creamy richness of cheesecake.
This recipe came about after years of experimenting with holiday desserts. I wanted something that would be a true centerpiece at my dinner table – beautiful to look at but also incredibly delicious.
What makes this cheesecake special is the careful balance of flavors. The graham cracker crust is enhanced with warm spices that complement the filling perfectly. The cheesecake itself is velvety smooth with just the right amount of orange zest to brighten each bite. And the cranberry topping? It’s the perfect sweet-tart contrast that makes this dessert unforgettable.
Every time I serve this cheesecake, I’m met with wide eyes and requests for the recipe. It strikes that perfect balance between impressive and approachable – exactly what I want in a holiday dessert. There’s something magical about the pop of bright red cranberries against the creamy cheesecake that instantly puts everyone in a festive mood.
I’ve tested this recipe countless times to ensure it’s foolproof, adjusting ratios, baking times, and techniques. The result is a cheesecake that comes out perfect every time – no cracks, no sinking, just pure decadence that will have your guests begging for the recipe!
Reasons You Will Love This Orange Cranberry Cheesecake
- A unique twist on traditional holiday desserts that will make your table stand out
- The perfect balance of sweet, tangy, and creamy flavors in every bite
- Stunning presentation with the vibrant red cranberry topping that requires no artistic skill
- Can be made ahead of time, perfect for busy holiday planning and stress-free entertaining
- Uses seasonal ingredients at their peak freshness when they’re most affordable
- Easier to make than it looks – impressive results without professional skills
- The contrast of textures between creamy cheesecake, buttery crust, and juicy cranberries
- Makes your kitchen smell amazing while baking – like a holiday candle but completely natural
- Guaranteed to become a new holiday tradition for your family!
- Leftovers (if there are any) taste even better the next day
Equipment Needed
- 9 or 10-inch springform pan
- Roasting pan (for water bath)
- Heavy-duty aluminum foil
- Stand mixer or hand mixer
- Mixing bowls
- Measuring cups and spoons
- Microplane or zester
- Small saucepan
- Rubber spatula
- Cooling rack
Ingredients
For The Crust:
- 2 cups graham cracker crumbs (about 16 full sheets)
- 3 tablespoons brown sugar
- 1 teaspoon ground cinnamon
- 1/2 teaspoon ground ginger
- 1/4 teaspoon ground cloves
- 1/4 teaspoon ground nutmeg
- 1/2 cup (1 stick) unsalted butter, melted
Description:
- Graham Cracker Crumbs – The foundation of our crust that provides the perfect texture and subtle sweetness.
- Brown Sugar – Adds depth of flavor and helps bind the crust together.
- Spices (Cinnamon, Ginger, Cloves, Nutmeg) – This blend creates a warmly spiced base that complements both the orange and cranberry flavors perfectly.
- Unsalted Butter – Acts as the glue that holds everything together and adds richness to the crust.
For The Filling:
- 4 (8 oz) packages cream cheese, completely softened to room temperature
- 1 1/4 cups granulated sugar
- 4 large eggs, room temperature
- 2 teaspoons vanilla extract
- 2 tablespoons fresh orange zest (from about 2 large oranges)
- 1/4 cup fresh orange juice
- 1 cup full-fat sour cream, room temperature
Description:
- Cream Cheese – Make sure it’s fully softened for a smooth, lump-free filling.
- Granulated Sugar – Balances the tanginess of the cream cheese perfectly.
- Eggs – Provide structure and richness to the cheesecake. Room temperature is essential!
- Vanilla Extract – Enhances all the other flavors in the cheesecake.
- Orange Zest and Juice – The star flavoring that gives this cheesecake its distinctive bright taste.
- Sour Cream – Creates that perfect creamy texture while adding a subtle tang.
For The Cranberry Topping:
- 6 oz (about half a 12 oz bag) fresh cranberries
- 3/4 cup granulated sugar
- 1/4 cup orange juice
- 1/4 cup water
- 1/2 teaspoon ground cinnamon
- 1/8 teaspoon ground cloves
Description:
- Fresh Cranberries – Their tartness balances the sweet, creamy cheesecake perfectly.
- Granulated Sugar – Tames the natural tartness of cranberries without making them too sweet.
- Orange Juice – Enhances the orange flavor in the cheesecake and adds brightness.
- Spices – A touch of warmth that ties everything together.
For Decoration (Optional):
- 1 cup heavy whipping cream
- 2 tablespoons granulated sugar
- 1/2 teaspoon vanilla extract
- Candied orange slices
- Sugared cranberries
- Fresh orange zest
How To Make A Perfect Orange Cranberry Cheesecake
Instructions – For The Crust
- Preheat oven to 325°F (165°C).
- Wrap the outside of a 9 or 10-inch springform pan with a double layer of heavy-duty aluminum foil, making sure it comes at least halfway up the sides.
- In a medium bowl, combine graham cracker crumbs, brown sugar, cinnamon, ginger, cloves, and nutmeg.
- Pour in melted butter and mix until the crumbs are evenly moistened.
- Press the mixture firmly into the bottom and about 1 inch up the sides of the springform pan.
- Bake for 10 minutes, then remove from oven and set aside to cool while preparing the filling.
Step 1: Prepare the pan Wrapping your springform pan in foil is crucial to prevent water from seeping in during the water bath stage. Be thorough and make sure there are no tears or openings.
Step 2: Make the crust mixture Thoroughly combining the dry ingredients before adding butter ensures all those warm spices are evenly distributed throughout the crust.
Step 3: Bake the crust Pre-baking helps set the crust so it maintains its structure when you add the wet filling. Don’t skip this step!
Instructions – For The Filling
- Reduce oven temperature to 300°F (150°C).
- In the bowl of a stand mixer fitted with the paddle attachment, beat cream cheese on medium-low speed until completely smooth, about 2 minutes.
- Add sugar and beat for another 1-2 minutes until well incorporated.
- Add eggs one at a time, beating well after each addition and scraping down the sides of the bowl as needed.
- Mix in vanilla extract, orange zest, and orange juice.
- Fold in sour cream until just combined. Do not overmix.
- Pour the filling into the prepared crust.
- Place the springform pan in a larger roasting pan. Fill the roasting pan with enough hot water to reach halfway up the sides of the springform pan.
- Bake for 1 hour and 15 minutes, or until the edges are set but the center still has a slight jiggle.
- Turn off the oven, crack the door open, and let the cheesecake cool in the oven for 1 hour.
- Remove from the oven and water bath, and let cool completely on a wire rack.
- Cover and refrigerate for at least 6 hours or overnight.
Step 1: Prepare the filling The key to a perfectly smooth cheesecake is having all ingredients at room temperature. Cold cream cheese or eggs will create lumps that are nearly impossible to remove once they form. I always set my ingredients out at least 2 hours before I plan to start baking.
Step 2: Beat the cream cheese properly Taking your time with this step is crucial for a smooth cheesecake. Make sure there are absolutely no lumps before moving on. I scrape down the sides of the bowl thoroughly at least twice during this process.
Step 3: Add eggs carefully Adding the eggs one at a time allows each to be fully incorporated, creating a stable structure for your cheesecake. Be careful not to overmix once the eggs are added, as this can incorporate too much air and lead to cracks.
Step 4: Gentle with final additions Folding in the sour cream gently preserves the air you’ve incorporated, leading to a lighter texture. The orange zest and juice add that beautiful citrus flavor that pairs so wonderfully with the cranberries.
Step 5: Water bath baking This method creates gentle, even heat around your cheesecake, preventing cracks and ensuring a silky-smooth texture. I find that boiling the water before adding it to the roasting pan gives the best results. Make sure your foil seal is tight – no one wants a soggy crust!
Step 1: Beat the cream cheese Taking your time with this step is crucial for a smooth cheesecake. Make sure there are absolutely no lumps before moving on.
Step 2: Add eggs carefully Adding the eggs one at a time allows each to be fully incorporated, creating a stable structure for your cheesecake.
Step 3: Gentle with final additions Folding in the sour cream gently preserves the air you’ve incorporated, leading to a lighter texture.
Step 4: Water bath baking This method creates gentle, even heat around your cheesecake, preventing cracks and ensuring a silky-smooth texture.
Instructions – For The Cranberry Topping
- In a medium saucepan, combine cranberries, sugar, orange juice, water, cinnamon, and cloves.
- Bring to a boil over medium heat, then reduce to a simmer and cook for 10-12 minutes, until cranberries burst and the mixture thickens.
- Remove from heat and let cool completely.
- Once both the cheesecake and topping are cool, spread the cranberry mixture evenly over the top of the cheesecake.
- Return to the refrigerator for at least 1 hour to set.
Step 1: Prepare the cranberry mixture I love watching cranberries cook – the way they pop and release their vibrant color is almost magical! The mixture will seem quite thin at first, but don’t worry. As the cranberries burst and release their natural pectin, the sauce will thicken beautifully.
Step 2: Cook the cranberries properly You’ll know they’re done when most have burst and the mixture has thickened enough to coat the back of a spoon. I like to gently mash some of the cranberries with the back of a wooden spoon to help release more of their flavor, but leave others whole for texture. The aroma of orange, cranberries, and warm spices will fill your kitchen with the most incredible holiday scent!
Step 3: Cool completely This is important! Adding warm topping to your chilled cheesecake can cause condensation and affect the texture. I usually make the topping while the cheesecake is baking, then let both components cool and set before assembling. The cranberry topping will continue to thicken as it cools, so don’t worry if it seems a bit loose when it’s hot.
Instructions – For Decoration
- In a chilled bowl, whip heavy cream, sugar, and vanilla until stiff peaks form.
- Pipe or spoon whipped cream around the edge of the cheesecake.
- Garnish with candied orange slices, sugared cranberries, and a sprinkle of fresh orange zest.
Step 1: Whip the cream properly For the best whipped cream, I always chill my mixing bowl and beaters in the freezer for about 15 minutes beforehand. This helps the cream whip up faster and hold its shape longer. Start beating on low speed, then gradually increase to medium-high as the cream begins to thicken.
Step 2: Create beautiful decorations Even if you don’t have fancy piping bags and tips, you can create a gorgeous presentation. I sometimes just use a zip-top bag with the corner snipped off to pipe simple dollops of whipped cream around the edge. The key is to space them evenly for a professional look.
Step 3: Arrange the garnishes I like to alternate candied orange slices and small clusters of sugared cranberries on top of the whipped cream dollops. The contrast of the bright orange and deep red against the white cream is absolutely stunning! A light dusting of additional orange zest over the entire cheesecake adds that final special touch that makes everyone reach for their phones to take pictures before diving in.
Make Ahead Tips
One of the best things about this Orange Cranberry Cheesecake is that you can (and should!) make it ahead of time. Here’s how I break it down:
2-3 days before serving:
- Make the candied orange slices and sugared cranberries – these keep beautifully in an airtight container at room temperature with layers of parchment paper between them
- Prepare the cranberry topping and store in an airtight container in the refrigerator – the flavors actually develop and improve over time!
1 day before serving:
- Bake the cheesecake and let it chill overnight – this resting period is non-negotiable for the best texture
- Apply the cranberry topping in the morning for the most vibrant presentation
Day of serving:
- Prepare the whipped cream and add final decorations 1-2 hours before serving – this keeps everything looking fresh and perfect
This timeline not only makes the process more manageable but also allows the flavors to meld together beautifully! I’ve found that cheesecake actually tastes better on the second day, as the orange flavor has time to fully permeate the filling.
When I’m hosting a big holiday dinner, this make-ahead schedule is absolutely essential for my sanity. There’s nothing worse than trying to juggle last-minute dessert preparations while also managing the main meal. With this timeline, I can focus on enjoying time with my guests while still presenting a show-stopping dessert!
FAQ’s and Troubleshooting
Can I use frozen cranberries instead of fresh? Absolutely! I’ve used frozen cranberries many times when fresh weren’t available. There’s no need to thaw them first; simply add them directly to the saucepan. You might need to cook them a minute or two longer since they start out colder, but otherwise the process is identical.
My cheesecake cracked! How can I fix it? Don’t panic! The cranberry topping will cover any cracks perfectly. For future reference, cracks typically happen due to drastic temperature changes or overmixing the batter. Make sure to follow the slow cooling process in the recipe.
How do I prevent my cheesecake from cracking? The water bath is your best friend here. It creates a humid environment that prevents the cheesecake from drying out and cracking. Also, allowing the cheesecake to cool gradually in the turned-off oven helps prevent temperature shocks that can cause cracks. I never skip this step!
Can I make this without a water bath? While it’s possible, I strongly recommend using one for the best texture and appearance. If you absolutely can’t use a water bath, place a pan of water on the rack below your cheesecake to create humidity in the oven. It’s not quite as effective, but it’s better than nothing!
My cranberry topping is too runny. What went wrong? It probably just needs more time to thicken. Remember that the topping will continue to thicken as it cools, especially after refrigeration. If it’s still too runny after cooling, you can return it to the heat and simmer for a few more minutes, or add 1 teaspoon of cornstarch mixed with 1 tablespoon of cold water to help it along.
Can I use a different crust? Absolutely! I’ve made this with a vanilla wafer crust and a gingersnap crust, and both were delicious. Just substitute the same amount of cookie crumbs for the graham crackers. The gingersnap version adds an extra layer of spice that complements the cranberries beautifully.
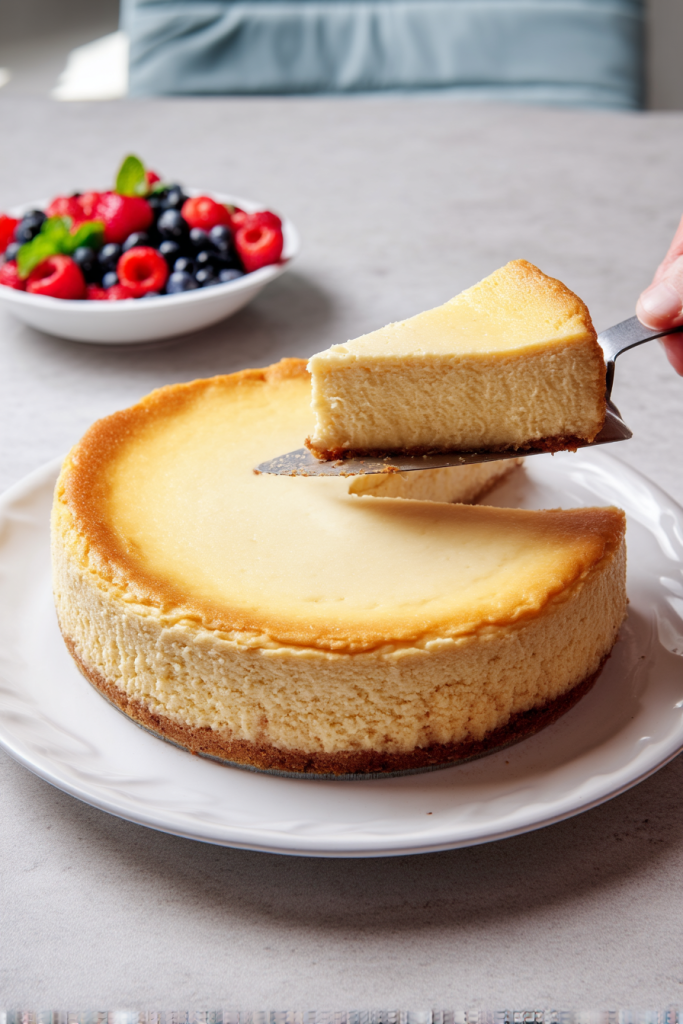
How do I know when my cheesecake is done baking? The perfect cheesecake should still have a slight jiggle in the center when you gently shake the pan. The edges should be set, but the center will still be somewhat soft (about a 2-3 inch circle in the middle). It will continue to set as it cools. If the entire cheesecake is jiggly, it needs more time. If it doesn’t jiggle at all, it’s slightly overbaked but will still be delicious!
Can I use light cream cheese or reduced-fat sour cream? I don’t recommend it. The full-fat versions create that luscious, silky texture that makes cheesecake so special. Using low-fat products can result in a less stable structure and sometimes a grainy texture.
How to Make Perfect Sugared Cranberries and Candied Orange Slices
These special touches really elevate this cheesecake from delicious to spectacular! Here’s how I make them:
For Sugared Cranberries:
- Combine 1 cup sugar and 1 cup water in a saucepan. Bring to a simmer until sugar is completely dissolved to create a simple syrup.
- Remove from heat and add 6 oz (about half a 12 oz bag) fresh cranberries. Let sit for 5 minutes – this quick bath in hot syrup creates the sticky surface needed for the sugar to adhere.
- Using a slotted spoon, transfer cranberries to a wire rack. Let dry for about 1 hour until they feel tacky to the touch but not wet.
- Roll cranberries in additional granulated sugar (about 1/2 cup) until fully coated. The transformation is magical – they look like they’ve been frosted by winter!
- Let dry completely before using, at least 1 hour or up to overnight.
One batch makes more than you’ll need for decoration, which means you get to enjoy the extras as a sweet-tart snack! They’re absolutely addictive – the crunchy sugar coating gives way to that distinctive cranberry pop. My family always hovers around the kitchen hoping to snag a few before they make it onto the cheesecake.
For Candied Orange Slices:
- Thinly slice 1-2 oranges (about 1/8 inch thick). Try to keep the slices uniform for even cooking.
- Combine 1 cup sugar and 1 cup water in a saucepan. Bring to a simmer, stirring until sugar dissolves completely.
- Add orange slices in a single layer and simmer gently for 15-20 minutes, turning occasionally. You’ll see the rinds become translucent as they cook.
- Transfer to a wire rack and let dry for several hours or overnight. They’ll develop that beautiful glossy, jewel-like quality as they dry.
- Pro tip: Save the orange-infused syrup to use when making the sugared cranberries! This adds an extra layer of orange flavor that complements the cranberries perfectly.
These gorgeous garnishes can be made several days in advance and stored between layers of parchment paper in an airtight container. Don’t refrigerate them though – the humidity can cause the sugar coating to dissolve.
What I love about these decorations is that they look extremely impressive but are actually quite simple to make. Even if you’re not typically crafty with food presentation, these are foolproof show-stoppers that will have everyone thinking you ordered from a high-end bakery!
How To Store
This cheesecake keeps beautifully in the refrigerator for up to 5 days, though it rarely lasts that long in my house! Just cover it loosely with plastic wrap or store in a cake container to protect it from absorbing other flavors in your refrigerator.
For the best texture and flavor, I recommend taking the cheesecake out of the refrigerator about 30 minutes before serving. This allows it to warm up slightly, which really enhances the creamy texture and lets the orange and cranberry flavors shine.
You can also freeze this cheesecake for up to 2 months! This is perfect if you want to prepare even further ahead for a big holiday. To freeze, allow the cheesecake to set completely in the refrigerator, then remove the sides of the springform pan. Place the cheesecake (still on the springform base) on a cardboard round, wrap tightly with plastic wrap, then aluminum foil. Thaw overnight in the refrigerator before serving.
For the best presentation, I recommend adding the whipped cream and garnishes after thawing, just before serving. The cranberry topping freezes well with the cheesecake, but the fresh decorations definitely need to be added after thawing.
One of my favorite holiday traditions is to make an extra cheesecake just to freeze in individual slices. There’s nothing better than having a piece of holiday cheer tucked away for a random January day when you need a special treat! To freeze individual slices, cut with a warm knife, place on a baking sheet until frozen solid, then wrap each piece individually and store in a freezer container.
Whether you’re making this for a special occasion or just because you love the combination of orange and cranberry, I hope this cheesecake brings as much joy to your table as it has to mine. The bright flavors, creamy texture, and stunning presentation make it a true celebration of the season!