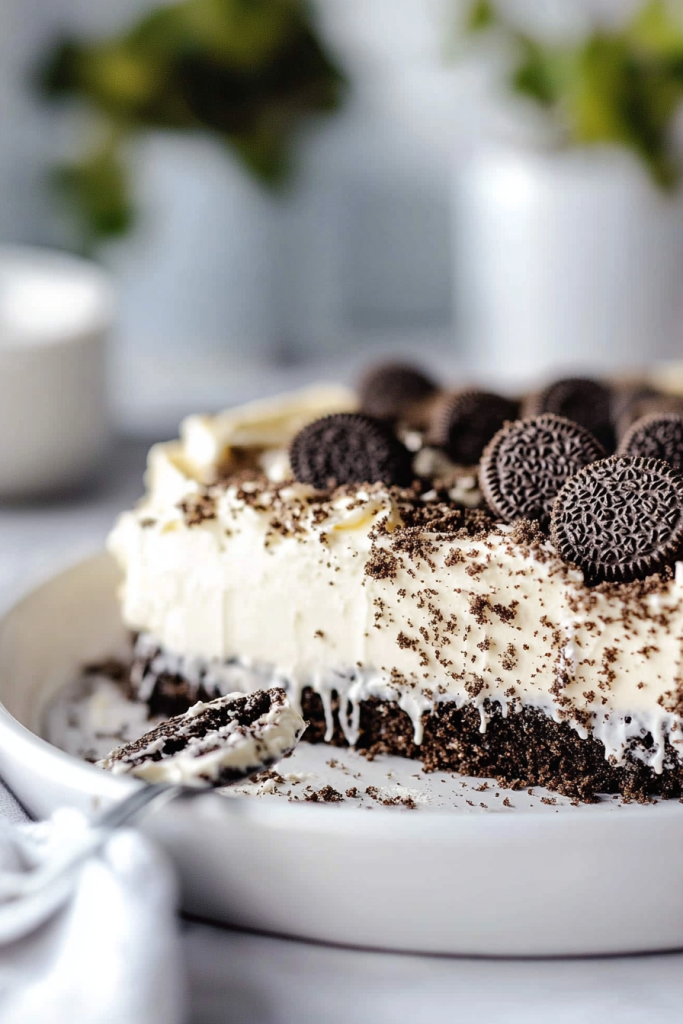
Looking for the ultimate no-bake dessert that’s equal parts nostalgic, indulgent, and irresistibly creamy? Say hello to my OREO Dirt Cake—the no-fuss, crowd-pleasing dessert that brings back childhood memories in every sweet, chocolatey bite. Made with layers of crushed Oreos, luscious vanilla pudding, tangy cream cheese, and fluffy Cool Whip, this chilled dessert is both rich and refreshing. It’s perfect for birthdays, barbecues, holidays, or just whenever you need an easy treat that gets devoured every time!
About The Recipe
This recipe is one of those desserts that never lasts more than a day in our house. Growing up, this was always the one dessert I begged my mom to make for potlucks and family parties. There’s something about that Oreo crunch paired with silky vanilla cream that hits all the right notes.
It’s incredibly easy to put together, which is one of my favorite parts. No oven. No fancy techniques. Just layers of simple ingredients that magically come together into something decadent. And if you’ve got kids in the house? This is a super fun one to make with them—they’ll love smashing the Oreos and helping layer everything into the pan.
Whether you’re a seasoned baker or just want a foolproof sweet to whip up last minute, this Oreo Dirt Cake is your go-to. Creamy, crunchy, and nostalgic in all the best ways.
Reasons You Will Love This OREO Dirt Cake
- No-bake and stress-free. This recipe requires zero oven time, making it the perfect make-ahead dessert, especially on hot days.
- Quick to prepare. Just a bit of mixing, layering, and chilling. That’s it!
- Kid-approved and party-ready. This one’s always a favorite at potlucks, birthdays, or school events.
- Rich, creamy, and chocolatey. Every bite is loaded with cool, fluffy vanilla cream and crunchy OREO goodness.
- Make-ahead magic. It actually gets better as it chills overnight!
Equipment Needed
- Food Processor (or zip-top bag + rolling pin)
- Mixing Bowls (one medium, one large)
- Hand Mixer or Stand Mixer
- Silicone Spatula
- Whisk
- 9×13-Inch Baking Dish
- Offset Spatula (optional for smoothing the top)
Ingredients
For the OREO Layers:
- 14 ounces OREO cookies
Crushed into fine crumbs to create that signature “dirt” texture. You’ll use half for the base and the other half as the topping. - 4 tablespoons unsalted butter, softened
Mixed with the cream cheese to add richness and help create that velvety smooth filling.
For the Creamy Filling:
- 8 ounces cream cheese, softened
This gives the filling its luscious texture and slight tang to balance the sweetness. - 1 cup confectioners’ sugar
Blends easily into the cream cheese and adds that smooth, sweet touch. - 3½ cups cold milk
Used to prepare the pudding base—make sure it’s cold so the pudding sets up properly. - Two (5.1 oz) boxes instant vanilla pudding mix
This is the secret to that fluffy, stabilized filling—no cooking required! - 12 ounces Cool Whip (or whipped topping)
Makes the filling ultra-light and airy while holding everything together beautifully.
Instructions
Step 1: Prepare the OREO Crust
- Crush the OREOs – Start by placing the 14 ounces of OREO cookies in a food processor and pulse them until they form fine crumbs. If you don’t have a food processor, you can place the cookies in a ziplock bag and crush them with a rolling pin.
- Layer the crust – Sprinkle half of the crushed OREOs into the bottom of an ungreased 9 x 13-inch pan, pressing gently to create an even base layer. Set the remaining crumbs aside for the topping later.
Step 2: Make the Creamy Filling
- Cream together butter, cream cheese, and powdered sugar – In a large mixing bowl, use an electric hand mixer to blend the 4 tablespoons of softened butter, 8 ounces of cream cheese, and 1 cup of powdered sugar. Beat until smooth and creamy, ensuring there are no lumps.
- Prepare the pudding – In a separate large bowl, whisk together the 3½ cups of cold milk and the two boxes of instant vanilla pudding mix until it thickens up (this usually takes about 2 minutes).
- Combine the two mixtures – Fold the prepared pudding mixture into the cream cheese mixture. Add spoonfuls of the cream cheese mixture into the pudding until fully combined. This will give you a luscious, smooth filling.
Step 3: Assemble the Cake
- Spread the creamy filling – Pour the cream cheese-pudding mixture over the OREO crust in your pan, spreading it evenly to cover the bottom.
- Top with Cool Whip – Gently fold the 12 ounces of Cool Whip into the filling mixture, then spread it evenly over the cake, creating a fluffy, cloud-like layer.
Step 4: Add the Final Touches
- Top with more OREOs – Finally, sprinkle the remaining crushed OREOs over the top of the cake for that signature “dirt” look.
- Refrigerate – Place the cake in the refrigerator and let it chill for at least 3 hours (or overnight) to allow the layers to set and the flavors to meld together.
Tips for Making the Perfect OREO Dirt Cake
Storage Tips
- Keep it refrigerated – This OREO Dirt Cake is best when served chilled, so be sure to keep it in the refrigerator. It can last for up to 3 days stored in an airtight container.
- Freezing for later – If you need to store it for longer, you can freeze the cake! Once fully set and assembled, cover it tightly with plastic wrap and then foil. It will stay fresh for up to 1 month in the freezer. When you’re ready to serve it, just let it thaw overnight in the refrigerator.
Can I Make it in Advance?
- Yes, absolutely! In fact, making it a day ahead is one of the best things you can do. This allows the flavors to really set and the pudding to firm up, making every bite even more indulgent.
Customization Ideas
- Add toppings – Feel free to get creative with your toppings! You can add chopped nuts like walnuts or pecans, or even drizzle melted chocolate over the top for an extra layer of decadence.
- Use different cookies – If you love variety, you can swap out the OREOs for other sandwich cookies like Golden OREOs for a vanilla twist or mint OREOs for a fresh flavor.
- Add a layer of fruit – For a fruity version, you can layer fresh berries like raspberries or strawberries between the pudding layers. This gives a lovely balance of sweetness and tartness.
Troubleshooting Tips
- Cake too runny? – Make sure the pudding has been mixed well and thickened before combining with the cream cheese mixture. If it’s still too runny, try adding a little extra powdered sugar to the filling and refrigerating for longer.
- How to avoid soggy crust? – If you find the crust becoming soggy too quickly, make sure the OREO crumbs are packed well and pressed down into a solid layer at the bottom. Let the cake chill for several hours to allow the crust to set before serving.
Conclusion
This OREO Dirt Cake is the ultimate dessert for parties, picnics, or any casual get-together. It’s easy to make, no-bake, and always a hit with both kids and adults. With its creamy layers, crunchy OREO topping, and rich flavor, it’s the perfect sweet treat for just about any occasion!
Enjoy making this fun dessert, and don’t forget to share it with family and friends for maximum enjoyment!