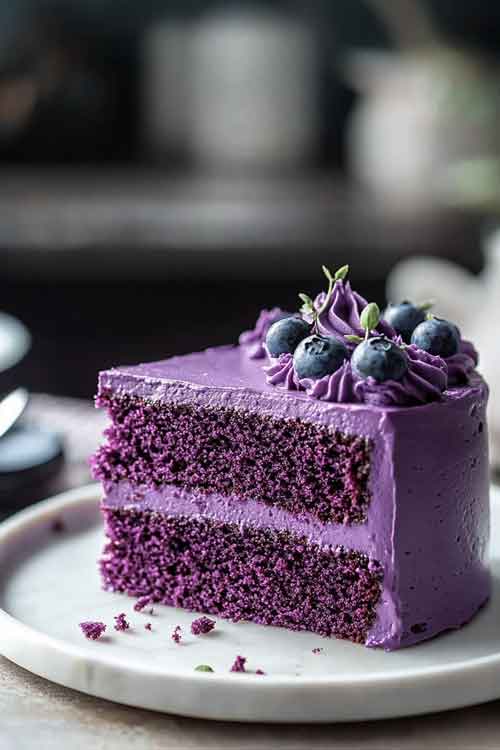
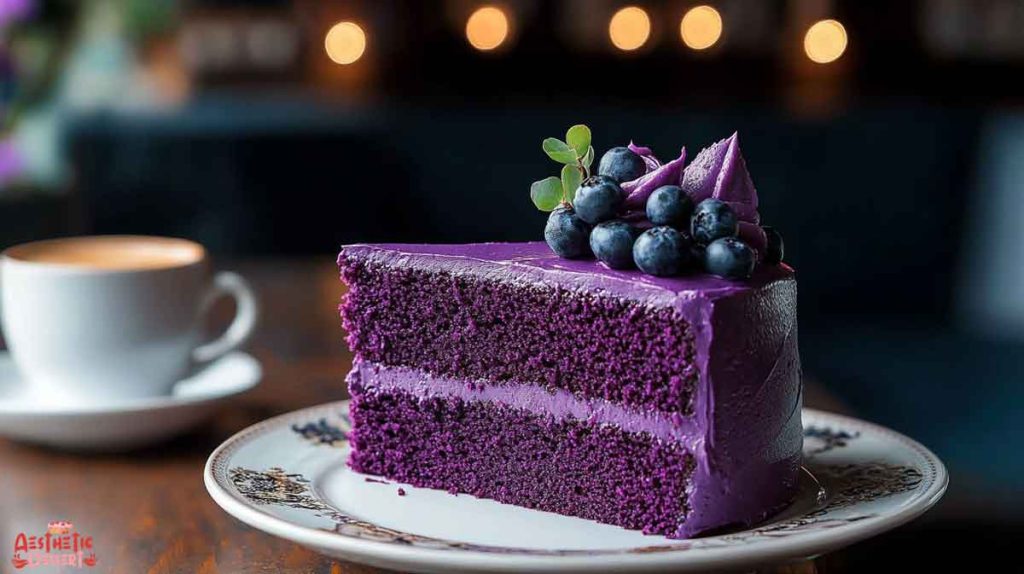
Are you looking to surprise your loved ones with a unique and flavorful cake? This Purple Velvet Cake Recipe is a vibrant twist on the classic red velvet cake. With its moist, velvety texture and luscious white chocolate cream cheese frosting, this cake is perfect for any celebration. Let’s dive into this step-by-step recipe that’s as fun to make as it is to eat.
Ingredients for Purple Velvet Cake
Before we start, make sure you’ve gathered all the necessary ingredients. This ensures a smooth baking process and perfect results.
Cake Layers
- 2⅛ cups (266 grams) all-purpose flour
- ¼ cup (24 grams) unsweetened cocoa powder (not Dutch processed)
- 1 teaspoon baking powder
- 1 teaspoon baking soda
- ¼ teaspoon salt
- 8 tablespoons (4 ounces) unsalted butter, softened
- 1½ cups (300 grams) granulated sugar
- 2 eggs, room temperature
- 1 teaspoon vanilla extract
- 1 cup buttermilk
- 1 teaspoon white vinegar
- Purple food coloring, as desired
White Chocolate Cream Cheese Frosting
- 8 ounces (226 grams) white chocolate, melted and cooled
- 12 ounces (340 grams) cream cheese, softened
- 6 ounces (12 tablespoons or 170 grams) unsalted butter, softened
- 1 teaspoon vanilla extract
- Purple food coloring, as desired
Pro Tip: Use gel-based food coloring for vibrant results without altering the texture.
Required Kitchen Tools
Here’s a list of kitchen tools that will help you achieve a professional finish:
- Mixing Bowls – Large and medium for wet and dry ingredients.
- Hand or Stand Mixer – Essential for a lump-free batter and smooth frosting.
- Measuring Cups and Spoons – For precise measurements.
- Cake Pans – Two 8-inch round pans for even layers.
- Parchment Paper – To line the cake pans and prevent sticking.
Step 1: Preparing the Cake Layers
Mixing the Dry Ingredients
Start by sifting together the flour, cocoa powder, baking powder, baking soda, and salt in a medium-sized bowl. This step ensures a lump-free mixture and an even rise for your cake.
Creaming Butter and Sugar
In a large mixing bowl, cream the softened butter and granulated sugar until light and fluffy. This typically takes about 3-5 minutes with a hand or stand mixer. Add the eggs one at a time, beating well after each addition. Stir in the vanilla extract.
Combining Wet and Dry Ingredients
Gradually add the dry ingredients to the creamed mixture, alternating with the buttermilk. Begin and end with the dry ingredients. Stir in the white vinegar and food coloring until the batter is smooth and has reached your desired purple hue.
Preparing the Cake Pans
Grease the cake pans with butter and dust lightly with cocoa powder. Line the bottoms with parchment paper for easy release. Divide the batter evenly between the prepared pans.
Baking
Preheat your oven to 350°F (175°C) and bake the cake layers for 25-30 minutes or until a toothpick inserted in the center comes out clean. Let the cakes cool in the pans for 10 minutes before transferring them to a wire rack to cool completely.
Step 2: Preparing the White Chocolate Cream Cheese Frosting
Now that the cake layers are cooling, let’s whip up the frosting. This luscious white chocolate cream cheese frosting adds a creamy, rich flavor that perfectly complements the purple velvet cake.
Melting the White Chocolate
Start by melting the white chocolate. Use a double boiler or microwave in 20-second increments, stirring between each session to prevent overheating. Allow it to cool slightly while you prepare the other ingredients.
Creaming the Butter and Cream Cheese
In a large bowl, beat the softened cream cheese and butter until smooth and fluffy. This process ensures that the frosting will have a creamy consistency. Add the melted white chocolate and continue to mix until well combined.
Adding Vanilla and Food Coloring
Stir in the vanilla extract for added flavor. If you’d like your frosting to match the vibrant purple of the cake, add food coloring at this stage. Use small amounts and mix thoroughly until you achieve your desired shade.
Ensuring Perfect Consistency
If the frosting seems too soft, place it in the refrigerator for 10-15 minutes to firm up. Conversely, if it’s too stiff, beat it for another minute to loosen it up.
Step 3: Assembling the Purple Velvet Cake
This is where the magic happens—bringing the cake layers and frosting together to create a stunning dessert! Follow these steps for a perfectly layered and frosted purple velvet cake.
Leveling the Cake Layers
Before assembling, ensure your cake layers are completely cool. If the tops are domed, use a serrated knife to level them for a flat surface. This will help the layers stack evenly and look professional.
Layering the Cake
- Start with the Base Layer: Place one cake layer on a serving plate or cake stand. Spread a generous amount of frosting on top using an offset spatula for even coverage.
- Add the Second Layer: Carefully place the second cake layer on top of the frosted base. Repeat the process, spreading another layer of frosting.
- Top It Off: Place the final cake layer on top and gently press down to ensure the layers are secure.
Crumb Coating the Cake
To keep crumbs from mixing into the final layer of frosting:
- Spread a thin layer of frosting around the entire cake to seal in the crumbs.
- Chill the cake in the refrigerator for 20-30 minutes to set the crumb coat.
Final Frosting and Decoration
- Apply a thick, even layer of frosting over the entire cake. Smooth it out with an offset spatula for a polished look.
- Use any remaining frosting to create decorative swirls, piping, or patterns on the cake.
- For added flair, decorate with sprinkles, edible glitter, or fresh berries.
Step 4: Serving and Storing the Purple Velvet Cake
Your purple velvet cake is ready to impress! Here’s how to serve it for maximum enjoyment and tips to store any leftovers.
Serving the Cake
- Slice and Present: Use a sharp, serrated knife to cut clean slices of the cake. For extra precision, wipe the knife clean between slices.
- Pairing Suggestions: Serve the cake as is, or pair it with a dollop of whipped cream or a scoop of vanilla ice cream for a delightful dessert experience.
- Perfect for Any Occasion: Whether it’s a birthday, holiday, or just a weekend treat, this cake is guaranteed to be the star of the table.

Storing the Cake
- Room Temperature: If you plan to enjoy the cake within 1-2 days, cover it with a cake dome or wrap it tightly in plastic wrap to keep it moist.
- Refrigeration: For longer storage (up to 5 days), place the cake in an airtight container and refrigerate. Let it come to room temperature before serving for the best taste and texture.
- Freezing: To save the cake for a later date, slice it into portions, wrap each slice in plastic wrap, and store them in an airtight container or freezer bag. Thaw in the refrigerator overnight before enjoying.
Final Touch: Share the Joy
Whether you’re serving it to friends and family or savoring a slice by yourself, this purple velvet cake is a feast for both the eyes and taste buds. Share your creation on social media or at your next gathering and watch the compliments roll in!
Enjoy every bite of your homemade masterpiece!


