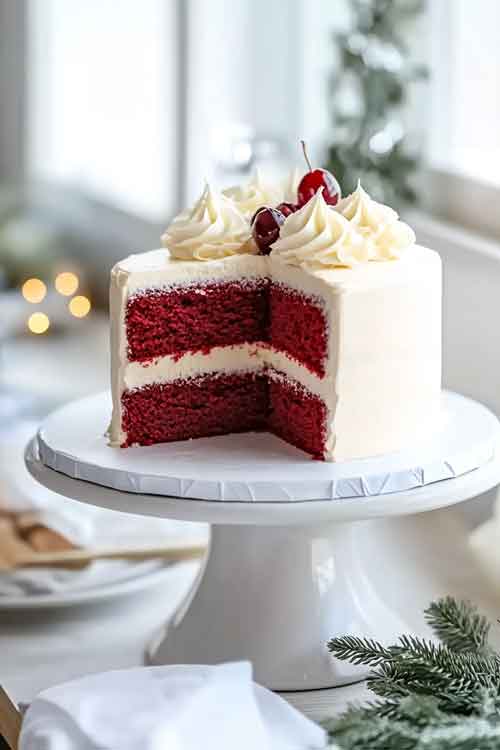
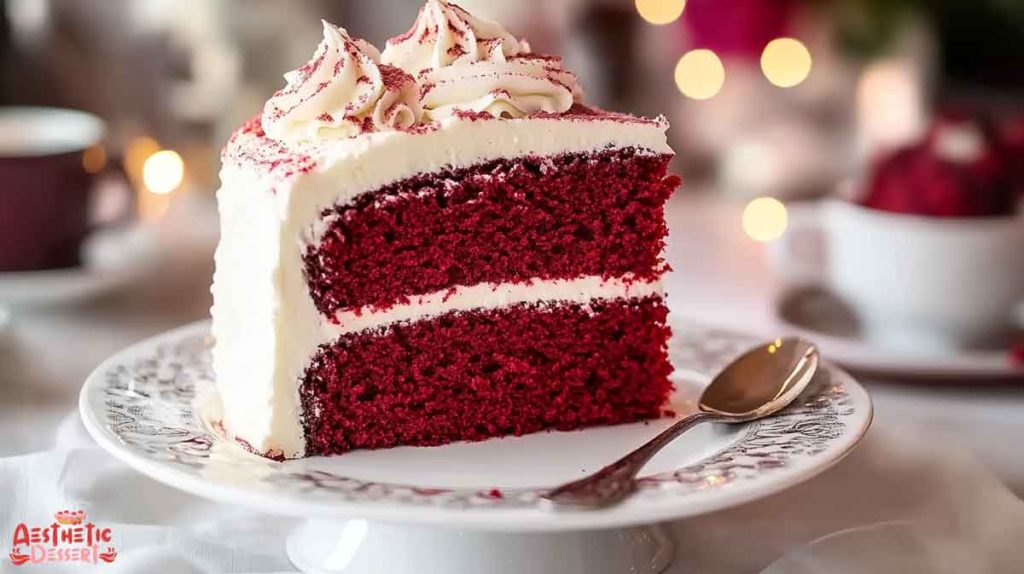
Indulge in the classic charm of a Red Velvet Cake! Its striking red hue paired with the creamy tang of cream cheese frosting makes it a favorite for celebrations or everyday indulgence. Let’s dive into how you can create this masterpiece at home.
Red Velvet Cake Recipe with Cream Cheese Frosting
1. Ingredients You’ll Need
For the Red Velvet Cake:
- Flour: 2¼ cups (275 g) all-purpose flour (or cake flour for a finer texture)
- Cornflour: 3 tbsp (18 g) for added lightness
- Cocoa Powder: 3 tbsp (14 g) unsweetened for that hint of chocolate flavor
- Baking Soda: ½ tsp
- Baking Powder: 1 tsp
- Salt: ½ tsp (omit if using salted butter)
- Butter: 6 tbsp (86 g), unsalted and at room temperature
- Vegetable Oil: ¾ cup (141 g), unflavored (like canola oil)
- Sugar: 1¾ cups (344 g) white granulated sugar
- Eggs: 3 large, room temperature
- Vanilla Essence: 1 tbsp (12 g) for a fragrant touch
- White Vinegar: 1½ tsp, for tenderness and vibrant color
- Red Food Coloring: 3½ tbsp (38 g), liquid
- Buttermilk: ¾ cup (158 g), at room temperature
For the Cream Cheese Frosting:
- Butter: Unsalted, room temperature, to keep the frosting creamy but not overwhelming
- Icing Sugar: Smooth powdered sugar for sweetness
- Cream Cheese: Firm, full-fat for stability
- Vanilla Extract: A splash for flavor
- Lemon Juice: Freshly squeezed to balance the sweetness
2. Kitchen Tools You’ll Need
To ensure a smooth baking process, gather these essentials:
- Mixing Bowls: Large and medium-sized for combining ingredients.
- Electric Mixer: A stand or hand mixer for a lump-free batter and fluffy frosting.
- 8-Inch Cake Tins: Two, greased or lined with parchment paper.
- Wire Rack: For cooling the cake layers evenly.
With your ingredients and tools ready, you’re all set to start baking!
Part 2: Preparing the Batter for the Red Velvet Cake
Mixing the Dry Ingredients
The secret to a perfectly balanced red velvet cake lies in how you prepare your batter. Start by preheating your oven to 160 °C (320°F) with the fan on. If your oven doesn’t have a fan function, adjust the temperature slightly to avoid overbaking.
- In a large bowl, sift together:
- 2¼ cups (275 g) all-purpose flour
- 3 tbsp (18 g) cornflour
- 3 tbsp (14 g) cocoa powder (unsweetened)
- ½ tsp baking soda
- 1 tsp baking powder
- ½ tsp salt (omit if using salted butter)
- Use a whisk or fork to combine these dry ingredients thoroughly. This step ensures an even distribution of leavening agents and cocoa.
Creaming the Butter, Oil, and Sugar
In another mixing bowl, combine:
- 6 tbsp (86 g) unsalted butter (room temperature)
- ¾ cup (141 g) unflavored vegetable oil (like canola)
- 1¾ cups (344 g) white granulated sugar
Using an electric hand mixer or stand mixer, beat these ingredients together for 2-3 minutes until the mixture becomes light, creamy, and pale in color. The combination of butter and oil gives this cake its moist yet airy texture.
Adding Wet Ingredients
- Beat in the eggs, one at a time, ensuring each is fully incorporated before adding the next. This should take about 10-15 seconds per egg.
- Add the 1 tbsp (12 g) vanilla essence, 1½ tsp white vinegar, and 3½ tbsp (38 g) red liquid food coloring. Mix until the vibrant red color is evenly distributed.
Combining the Mixtures
Switch to a spatula to finish the batter:
- Gently fold half of the dry ingredients into the wet mixture until just combined.
- Add all the ¾ cup (158 g) buttermilk and mix until incorporated.
- Finally, fold in the remaining dry ingredients. Be careful not to overmix, as this can result in a dense cake.
Dividing and Preparing the Cake Pans
- Evenly distribute the batter between two 8-inch cake tins that have been greased and lined.
- Smooth the tops with a spatula for an even bake.
Part 3: Baking the Red Velvet Cake
Baking the perfect red velvet cake requires precision and patience. Here’s how to do it:
Step 1: Preheat Your Oven
- Preheat your oven to 160°C (320°F) with the fan on. If your oven doesn’t have a fan function, set it to 170°C (340°F) for even baking.
- Prepare two 8-inch cake tins by greasing them or lining them with parchment paper. For an extra step of assurance, use a cake release mixture.
Step 2: Combine Wet Ingredients
- In a mixing bowl, cream together unsalted butter, vegetable oil, and sugar using a hand or stand mixer. Beat for about 2-3 minutes until the mixture becomes fluffy and creamy.
- Add the eggs, one at a time, mixing thoroughly between each addition (10-15 seconds per egg).
- Incorporate the vanilla extract, white vinegar, and red food coloring into the mixture. Mix until smooth and vibrant.
Step 3: Fold in Dry Ingredients and Buttermilk
- Divide the dry ingredients into two portions. Add the first half to the wet ingredients and gently fold them in using a spatula until just combined.
- Pour in the buttermilk, folding gently again.
- Finish by adding the remaining dry ingredients and fold until the batter is smooth and even. Avoid overmixing to ensure a tender crumb.
Step 4: Divide and Bake
- Evenly distribute the batter between the prepared cake tins. Smooth the surface with a spatula.
- Bake for 30 minutes, or until a toothpick inserted into the center comes out clean.
- Resist the temptation to open the oven door too early, as this can cause the cakes to sink.
Step 5: Cool the Cakes
- Once baked, allow the cakes to cool in their tins for about 15-20 minutes.
- Carefully transfer them to a wire rack and let them cool completely before frosting.
Part 4: Making the Cream Cheese Frosting
This frosting is the perfect blend of tangy and sweet, complementing the red velvet cake beautifully. Here’s how to make it:
Ingredients for the Frosting
- 1 cup (230g) cream cheese (softened)
- 1/2 cup (115g) unsalted butter (softened)
- 4 cups (500g) powdered sugar (sifted)
- 1 tsp vanilla extract
- Pinch of salt (optional, to balance sweetness)
Step 1: Cream Butter and Cream Cheese
- In a large mixing bowl, combine the softened cream cheese and butter.
- Beat on medium speed for about 2-3 minutes, until the mixture is smooth, light, and fluffy.
Step 2: Add Vanilla and Sugar
- Mix in the vanilla extract and a pinch of salt, if using.
- Gradually add the powdered sugar, one cup at a time, beating on low speed until fully incorporated.
- Once all the sugar is added, increase the speed to medium-high and beat for another 2-3 minutes. The frosting should be creamy, thick, and spreadable.
Step 3: Chill (Optional)
If the frosting feels too soft to work with, chill it in the refrigerator for 10-15 minutes to firm up slightly before spreading.
Part 5: Assembling the Red Velvet Cake

Now that your cake layers and frosting are ready, it’s time to bring everything together into a stunning dessert!
Step 1: Level the Cake Layers (Optional)
- Use a serrated knife to gently trim the tops of the cake layers if they’ve domed while baking. This will create flat, even layers for stacking.
- Save the crumbs from trimming if you’d like to use them as decoration later.
Step 2: Start Layering
- Place one cake layer on a serving plate or cake stand.
- Spread a generous amount of cream cheese frosting evenly across the top using an offset spatula.
Step 3: Add the Next Layers
- Gently place the second cake layer on top of the frosted layer.
- Repeat the frosting process, ensuring even coverage.
- For a three-layer cake, add the third layer and frost its top.
Step 4: Apply a Crumb Coat
- Spread a thin layer of frosting around the entire cake to trap crumbs.
- Chill the cake for 15–30 minutes to set the crumb coat.
Step 5: Frost and Decorate
- Apply the final layer of frosting, smoothing it out evenly over the top and sides.
- Use any remaining crumbs, sprinkles, or piped frosting to decorate the cake as desired.
Step 6: Serve and Enjoy
- Slice the cake with a clean, sharp knife, wiping it between cuts for neat slices.
- Store leftovers (if any!) in an airtight container in the refrigerator for up to 5 days.
Final Words
Red Velvet Cake is more than just a dessert—it’s an experience. With its vibrant color, rich flavor, and creamy frosting, it has the power to turn any occasion into something truly special.
Whether you’re baking it for a celebration or simply treating yourself, this cake is bound to be a crowd-pleaser.


